HSF Challenge #20 – Alternative Universe

I chose the HBO Series, The Game of Thrones, specifically the character of  Lady Oleana Tyrell,  the matriarch of House Tyrell.  She is quite a force in the series.  She is ancient and she usually says whatever on her mind.  She doesn’t seem to take any prisoners, so beware.  She is also referred to as the Queen of Thorns because of the many barbs that she utters.

Here, I present images of the lady:


Lady Olenna Tyrell's -15

Lady Olenna Tyrell's -14

Lady Olenna Tyrell's -4

Lady Olenna Tyrell's -5

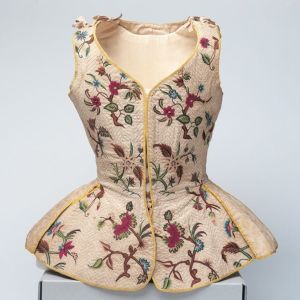
Her costumes consist of many interesting elements.  Most notable are her Medieval style wimple, barbette, hat and vale,  add the  beautiful brocade fabric that she seems to favor.  All of which were used to create her costume and represent her station in life.  There was a little scene in which she and her granddaughter were selecting jewelry for some occasion and the pieces that she didn’t like, she simply tossed off the balcony.

This to me was the challenge to select fabrics that conveyed her style and her station in life as the head of her house.  The house Tyrell’s color is green, however, Lady Oleana wore other colors as well.

Through out this year’s challenge, I have used fabrics and notions from my stash.  Again only using material from my stash,  my color story will be the following:

DSCN0895
Colors are reading really blue, but some are more steel grayish blue, and cobalt blue.  I label my fabric with date, amount and number of yards.    The oldest fabric in this group selection dates back to 2010.


DSCN0894


I particular loved the fern pattern encrusted fabric.  This will be the material for the jacket. It was a remnant with only 1 3/4 yards purchased in 2010 a little over $3.

I started with the jacket first. I used Vogue pattern V8522 and morphed style B and C together to obtain the style similar to this one:

Lady Olenna Tyrell's -5

DSCN0898

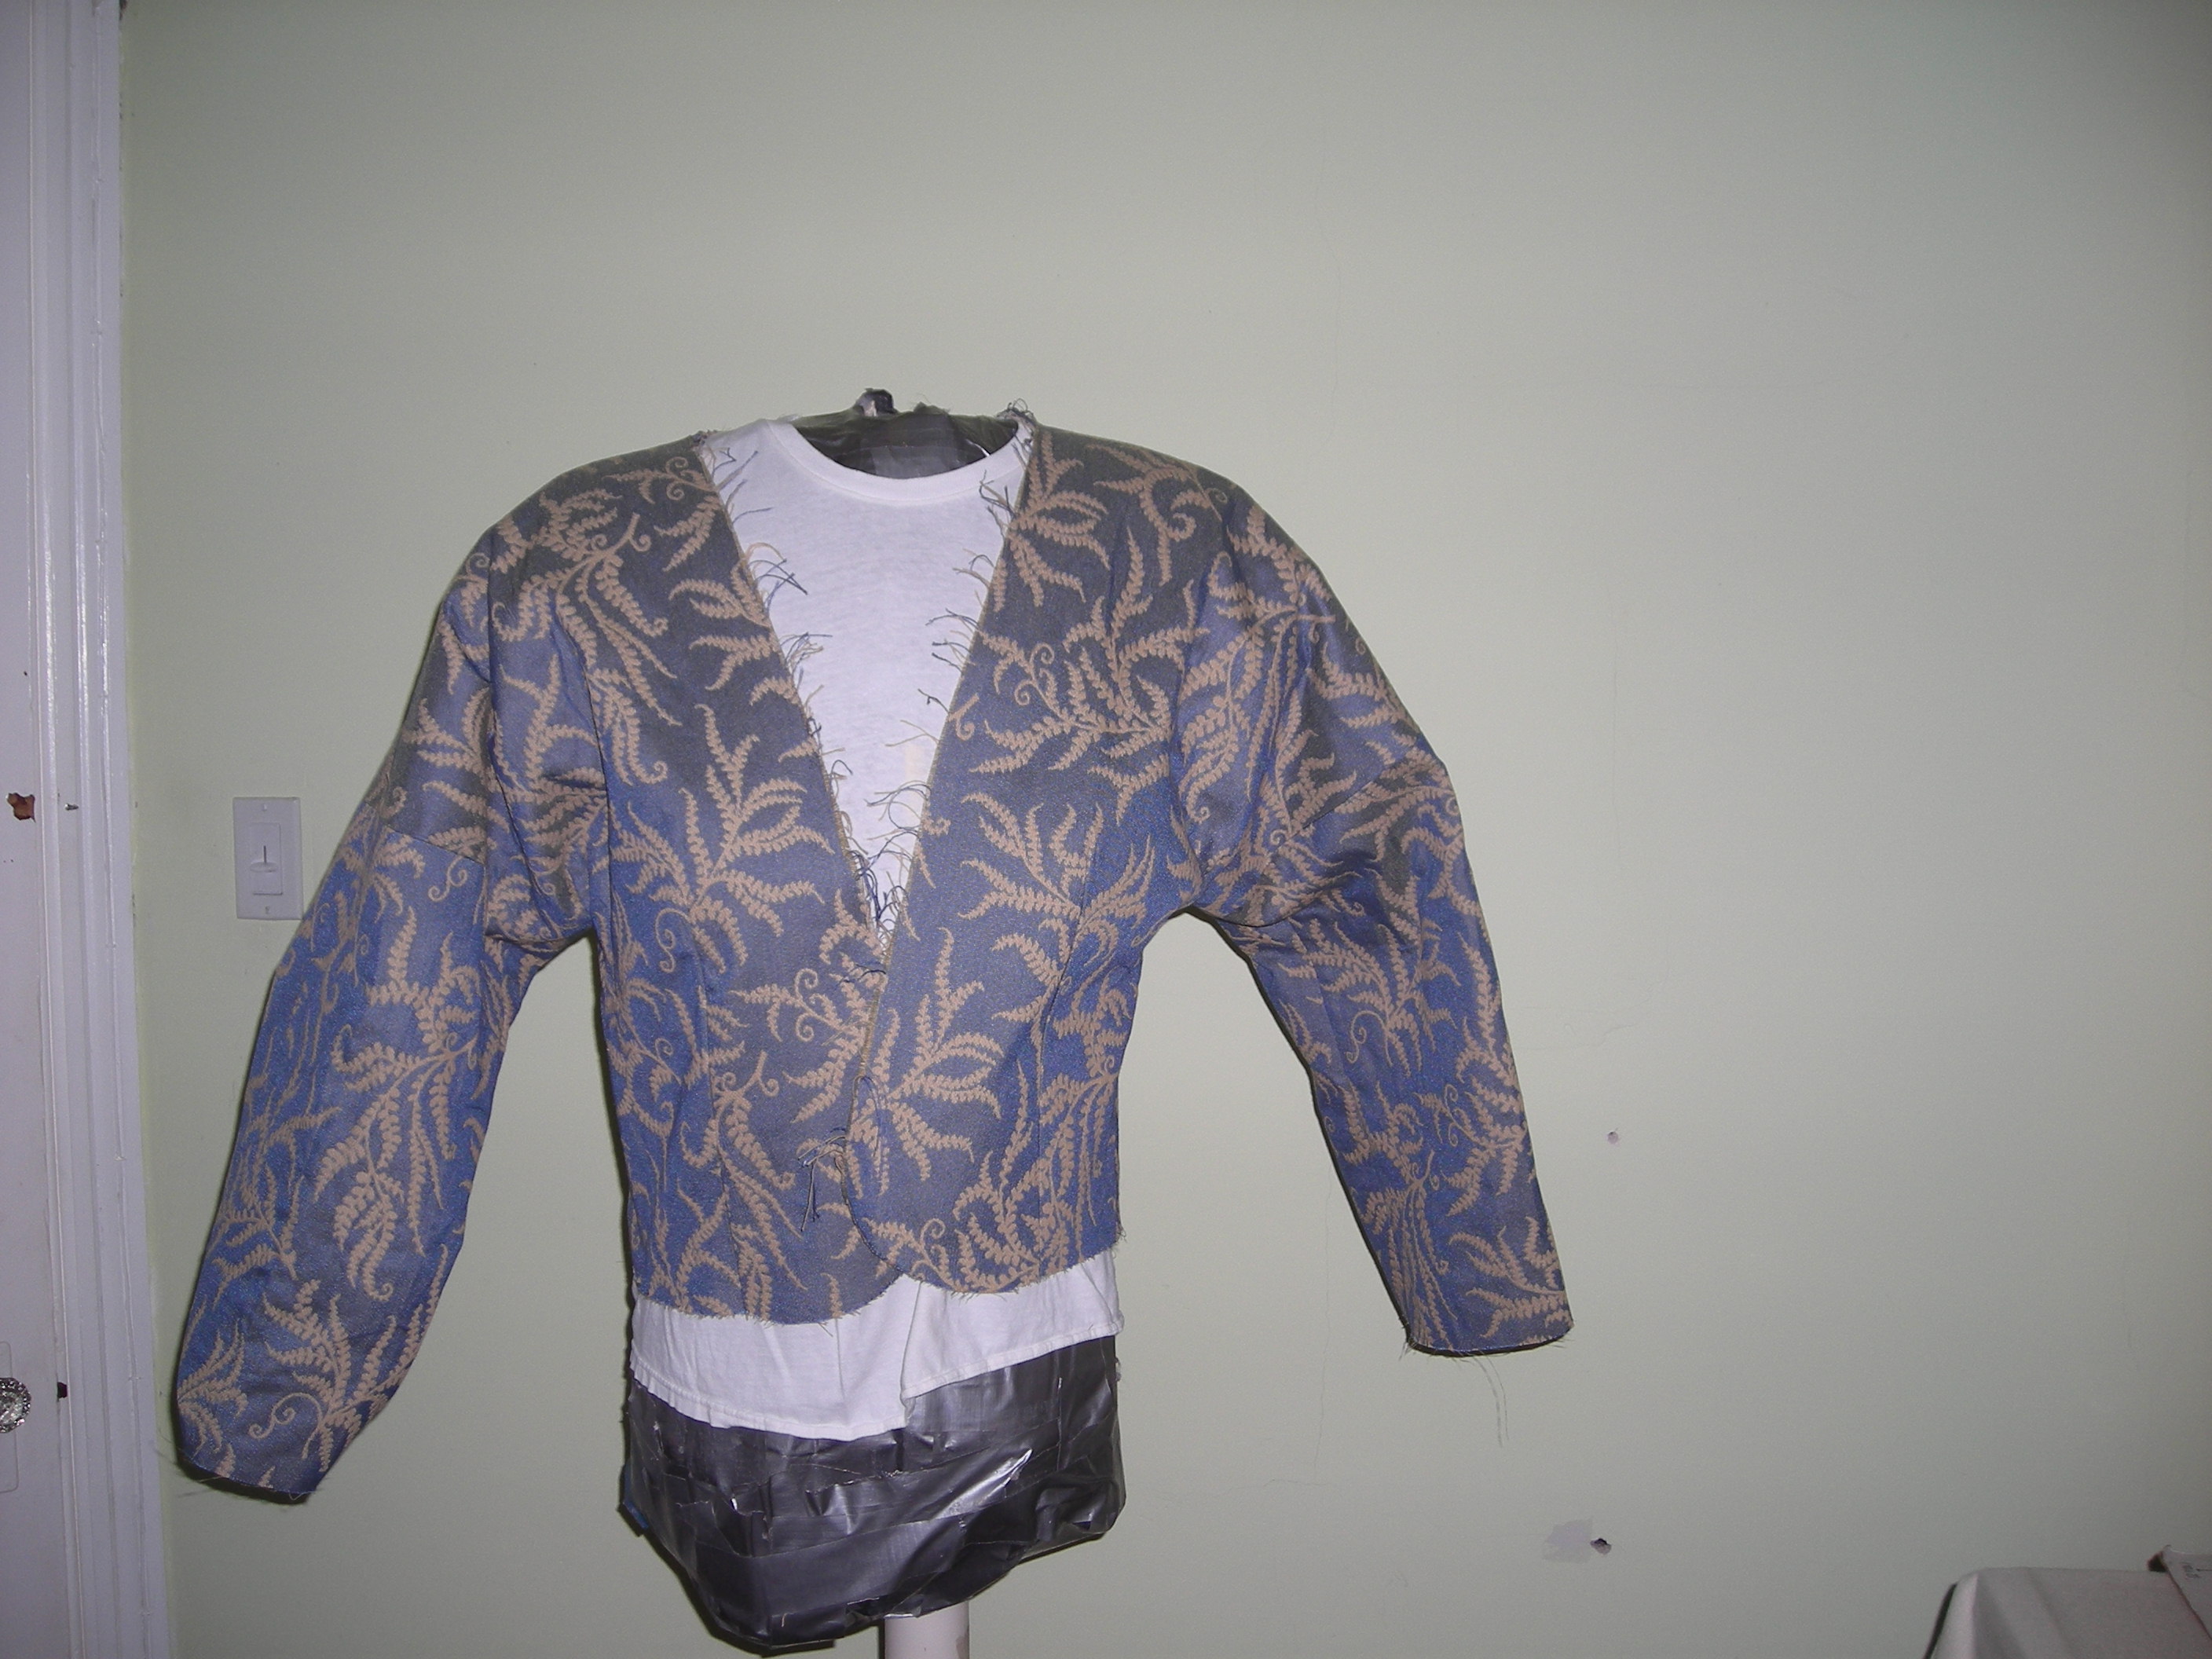
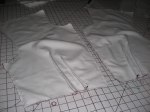
Oleana usually appears in wide shawl collars jackets and coats, but ocassionally also in no collar jackets.  I chose the no collar jacket as my inspiration. This is the jacket after 2 mock-ups.  It is beginning to take shape on Maude. I also altered the shape of the sleeves somewhat.

DSCN0900

The lining has been applied to the jacket to create a bag lining. I normally don’t like bag linings but the shoulders were so wide in this instance it was not a problem to pull everything through one shoulder.  It took forever to press though.

DSCN0902

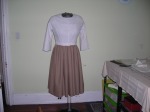
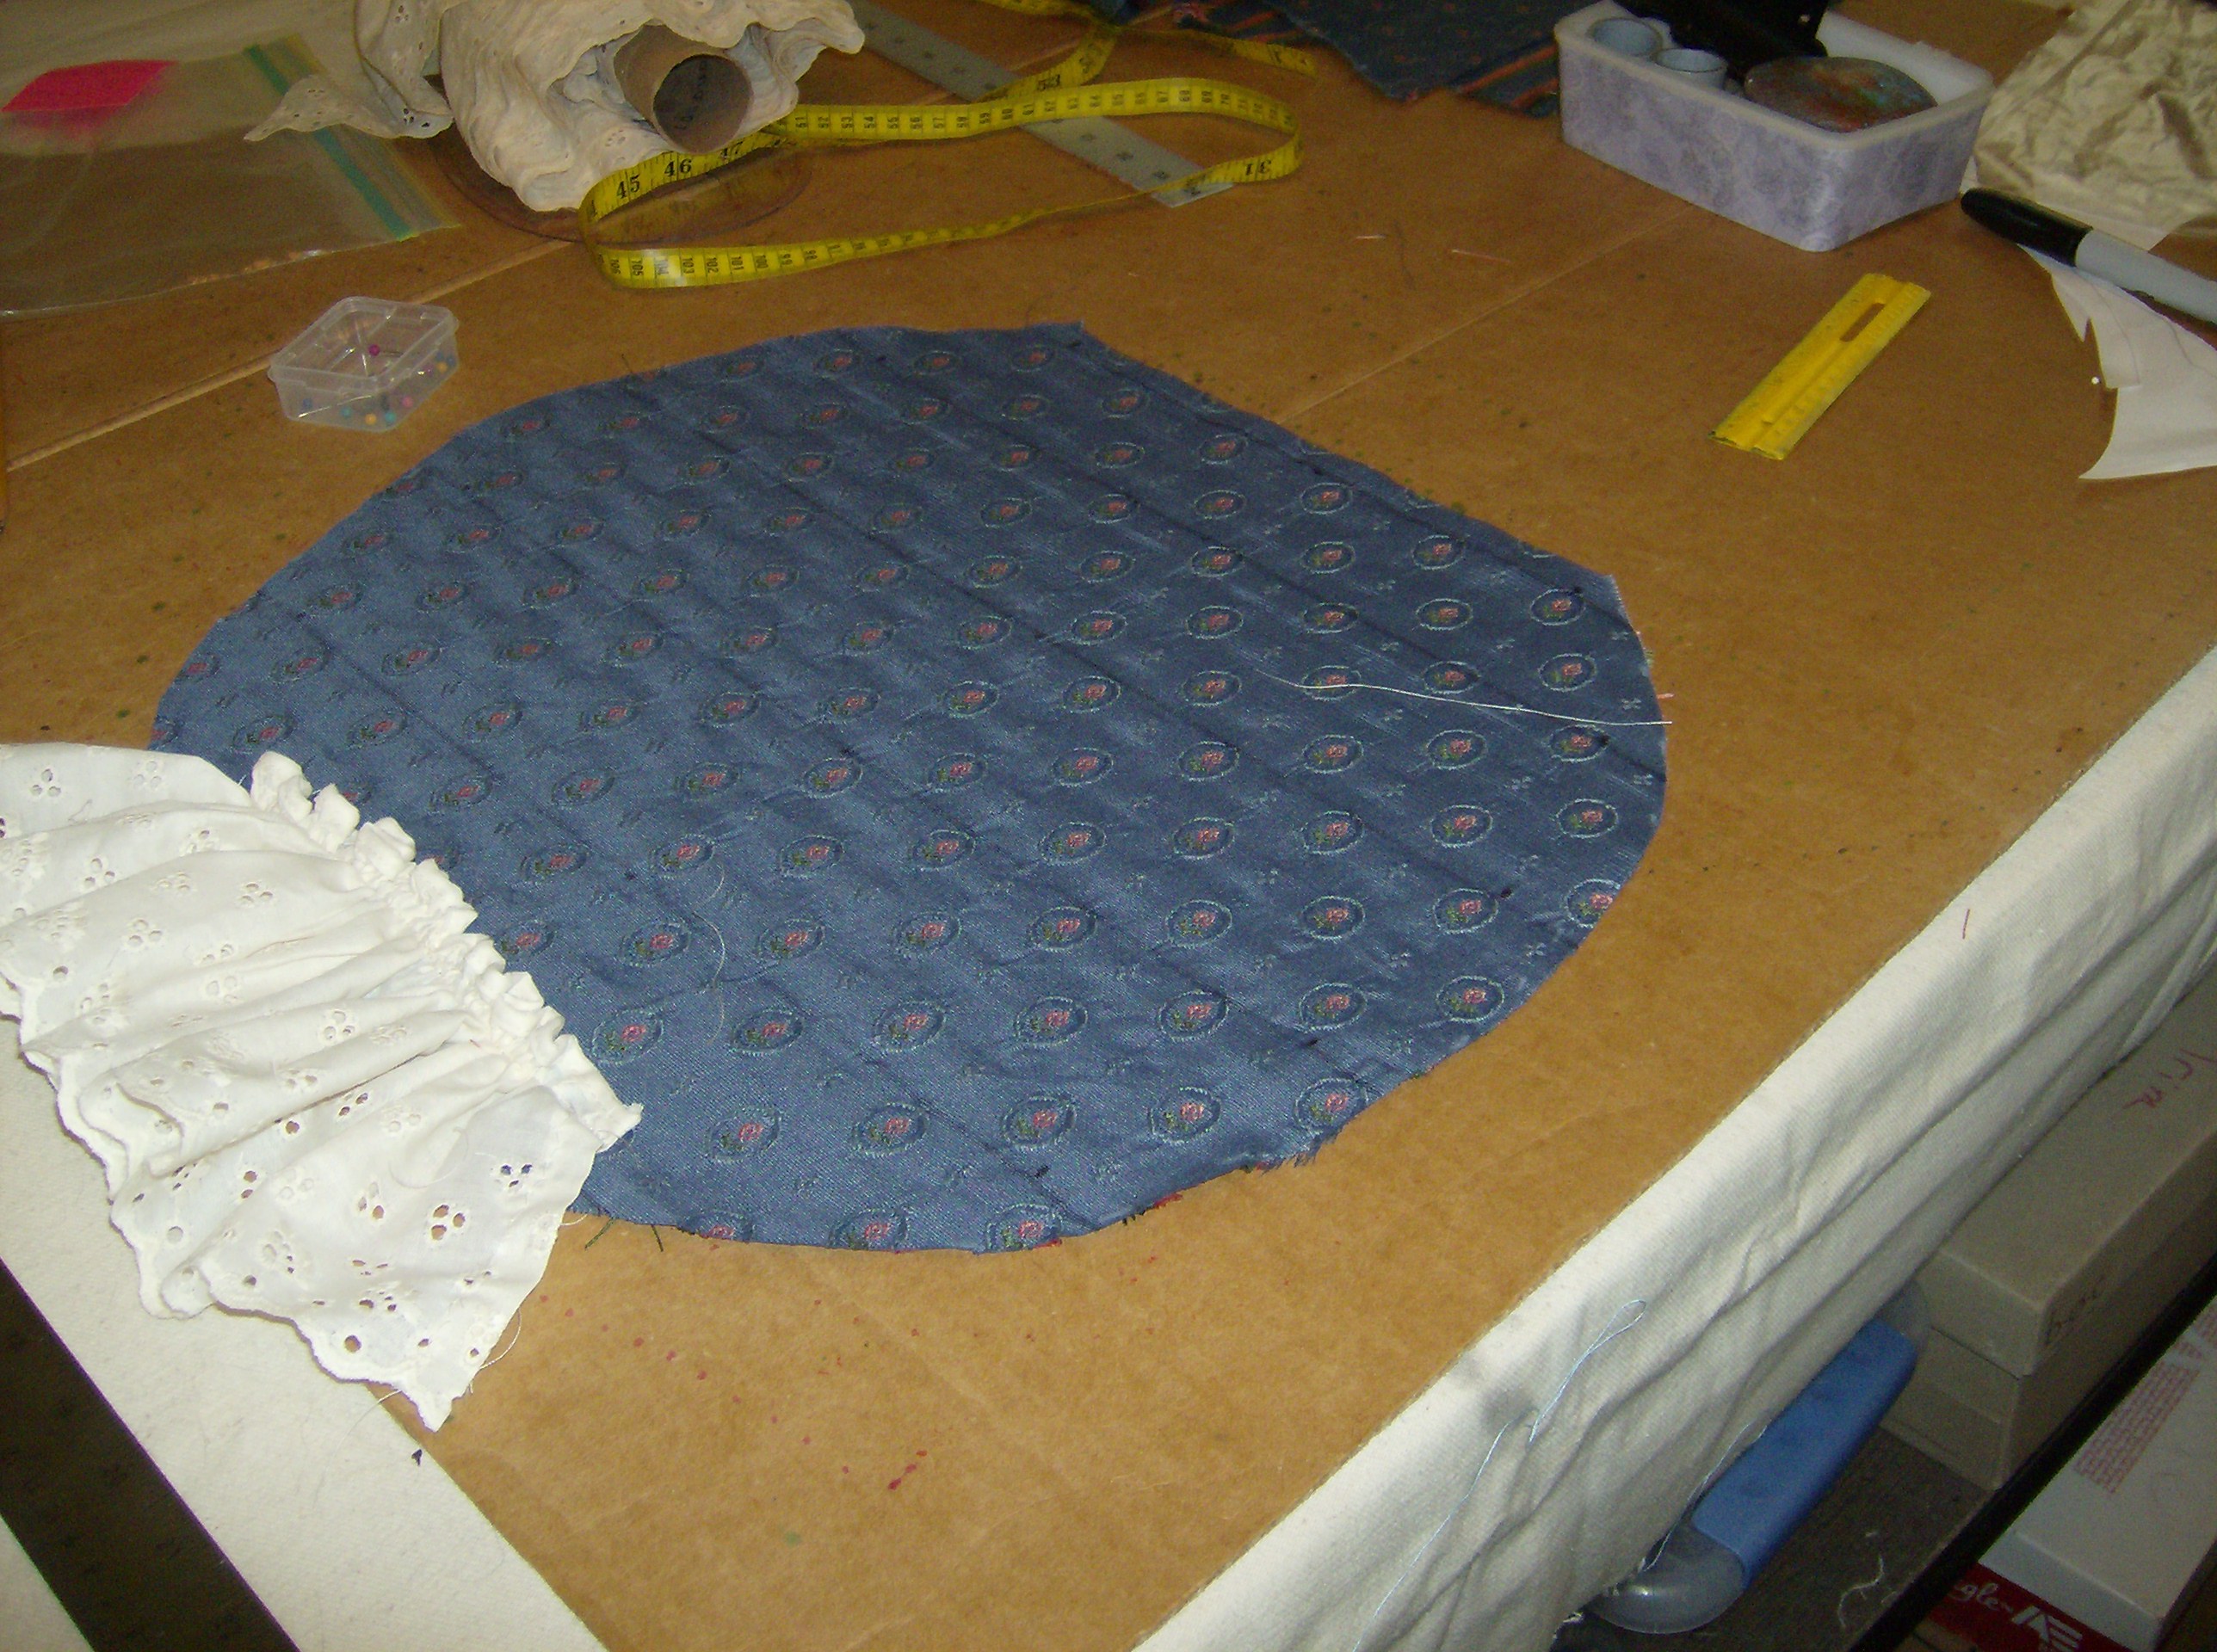
The outer skirt and underskirt fabric really play off of each other and the move the color story forward. I love them.  To the right you see the beginning of the hat with vale.

DSCN0904 DSCN0905

I added the skirts to the same waistband.  Both under and outer skirts are pleated.

Lady Olenna Tyrell's -1

This finished outfit.

DSCN0910

DSCN0918

DSCN0908

The jacket could have been just a couple of inches longer.


DSCN0907

DSCN0917

DSCN0918

This was a really fun challenge for me.  It was a lot of work, but to me everything turned out as I had envisioned.

The Challenge #20 – Alternative Universe

Fabric: Cotton blend brocade, two unknown fabric contents

Year: ?

Historically Accurate: No

Hours to Complete: Two full weeks

First: Not Yet

Total Cost: $15 Approximately

HSF Challenge 19 – Inspiration

For this challenge we were to use  other  costumers submissions as an inspiration.  However early on I found this picture of Gabrielle Chanel.

1930s Pants Coco Chanel

There was something about this picture that struck my fancy.  Can you image going to the beach dressed like this.  It is simply fabulous.  I looked through the back submissions and low and behold the Dreamstress had a early submission from challenge #2.  She made Smooth Sailing Trousers.  So, I married the two to create the outfit for this challenge.

Upon closer inspection of the picture, I noticed something interesting  about the picture.  First, the man, let’s call him, Jean Claud.  He is holding Gabrielle by the wrist and she really is leaning away from him even though she is smiling at the camera.  I told myself, he is asking her to meet him tonight.  She says “no”, it is over Jean Claud.

DSCN0890

My version of the Chanel’s outfit included the slacks, probably from the 30s, the black knit top, the pearls, and the hat with the large hat pin.  The pants are wide leg linen slacks, both the top and the pants were made using commercial patterns that I had on hand.  The hat, I simply cut the top crown from a cheap straw hat. It provided the right feel for the rest of the outfit.


DSCN0891

The finished outfit. I like this simple summer outfit.

DSCN0892

The simple hat with the pin.  I think that it adds the right touch to the entire outfit.

The Challenge:  HSF Inspiration

Fabric:  Natural colored linen, black knit

Pattern: Vogue pattern 8604 for the slacks &  Vogue 9771 for the knit top.  Both patterns had the right vintage feel for me to use them.

Notions: Pearl beads from AC Moore’s craft store, I also had already on hand

Historically Accurate: 

Hours to complete:  two weekends

First worn: not yet

Total cost:  zero everything from my stash


While later while searching the net for inspiration historical fashion pictures, I found yet another picture of Chanel in the same outfit but with a different man.


1930s Pants Coco Chanel -1

I submit this is why it is over with Jean Claud.  I named this man Etienne, there is a big smile on  Chanel’s face.  Plus she is resting on his broad shoulders. Poor Jean Claud!

Historical Fortnightly Challenge # 17 – Yellow

For this challenge, I combined this challenge with challenge #16, Terminology.  I made the terminology challenge in yellow.  Which would provide me with a bit more time for the next challenge, Poetry in Motion.

I made a 1740s – 1770s set of Jumps in yellow.  The following images provided the inspiration:

#17 1780 Jacket French HSF 2014

I purchased the yellow cornflower fabric several years ago with the express intent to create this jacket from the 1780s.  But atlas, I never got around to it.  Since challenge 17 was yellow and I couldn’t find or didn’t have any suitable yellow in my stash, I went the cornflower yellow fabric that I had been hording for the past several years.

Pattern and pictures removed, I did not have authorization to publish the images.

One of the most interesting things for this challenge was that I ran across a scaled pattern for jumps from the Atwater Kent Museum here in Philadelphia or near Philadelphia.  It was my first time attempting to create a garment from a scaled drawing.

This is the pattern from the museum:


It looked fairly simple with only two pattern pieces and minimum instructions for construction.  I had purchased some wonderful cornflower upholstery fabric several years ago.  I only had about 1  1/2 yards of this fabric.  So this project would be ideal.  I first scaled the pattern up as indicated from the museum.  After that, I really had to enlarge the pattern pieces this pattern was really small.

DSCN0843 DSCN0844 DSCN0845

You can see the mockups.  I think that the green was the very first attempt and beige was the second attempt.  The green does not even come to the center front, so I extended the front about 1 1/2 inches.  The museum indicated the garment used ties, I had some burgundy twill tape that I thought would look nice with the yellow.  I sort of created my own under structure to support the ties.  I knew that I didn’t want the tie support stitches to be seen on the outside of the outer fabric.  Cut two internal facings to attach the ties to and then stitched them to the lining.

DSCN0846

It worked.  Once again, I did not want to bag line this so I opted as I have done in the past several challenges to mount the outer shell to the lining shell around all of the edges.  A lot of hand stitching, but to me it looks better.  I actually find that I like it better, so that’s what I did.


DSCN0847

As I mentioned, a lot of hand sewing and a lot of pins.  Notice the burgundy with the yellow, I like it.

DSCN0859 DSCN0860 DSCN0862 DSCN0861 DSCN0863

The completed set of jumps.  To complete the image, I used an old petticoat which I had on hand, a brownish color that sort of complimented the yellow and burgundy.

The Challenge:  #17 Yellow

Fabric: 1 1/2 yards of Cornflower yellow fabric, purchased around 2010, Jomar’s in Philadelpia

Pattern: Atwater Kent Museum Scaled Pattern

Notion: Burgundy twill tape

Historical Accurate: I would say about 80%, the pattern is for sure.

Hours to complete: Over a week with the hand sewing, portions of the jumps at a time.

First Worn: Not yet!

Total cost: $4 or $5 dollars

DSCN0857

The finished ensemble with yellow jumps.

HSF Challenge #16 – Terminology

I don’t know, I actually had a bit of a struggle deciding on the term to select. Eventually, Jumps and or Waistcoat won out. In looking for inspiration pictures and information, I found that some museums called this garment jumps.  While others referred to it as a waistcoat.  Since both terms are mentioned in the challenge terminology’s glossary, I choose this to illustrate.

#16  1725 Jumps, ca. 1725; Arizona Costume Institute 1995.c.15

The garment above is from  ” ca. 1725; Arizona Costume Institute 1995.c.15″

#17 1740s Jumps - Yellow       Yellow Jumps from the 1740s

I also found a simple pattern from the Atwater Kent Museum Friends Historical Collection located in Philadelphia                   1740s Jumps Pattern

This museum called it a waistcoat.  The pattern looked rather simple  in design and easy to construct.  I have never created a garment from a scaled pattern before.  So, this was a first for me.


DSCN0841

After taking my time to scale up the pattern, I quickly realized that I would need to enlarge and or extend the length of the pattern

DSCN0842

This is a close up view of the front pattern piece extended several inches, about four or five inches.  The added section looks a lot larger in the picture for some reason.

DSCN0843

Mockup after pattern adjustment.  The front piece is two wide as you can see, the beige front piece.  The green piece is much better, the second mockup.

  DSCN0844

I decided to go with ties as indicated on the scaled pattern from Atwater Kent. However, because of the added portion, I needed to add a fourth tie.  Also, I needed to figure out how I wanted to attach the ties.  I had some burgundy twill tape and decided that it would look good with the cornflower yellow fabric I had planned to use.   I used two strips of scrap fabric that I had left from the lining material and attached the twill tape ties.  I knew that I did not want the ties attachments to show from the outside of the fashion fabric.  I placed the scrap twill tape tie pieces on the inside of the lining shell.  In this way, the strips of material would be enclosed between the lining and the fashion fabric with no visual stitching from the outside.

DSCN0845

This method proved to work.  You can see the lining with the twill tie tape attached.  When the fashion fabric is mounted, the ties will be enclosed.

DSCN0846

In the above picture the fashion fabric has been mounted onto the lining and the ties are in between.

DSCN0847

The lining and the outside fabric have been pinned together.  All of the surface edges must be hand sewn.  I supposed I could have machine sewn them, but I have found that hand sewing the edges of the garment turn out much better.  So that is what I did.

DSCN0857 DSCN0859 DSCN0860

The finished jumps. As I have mentioned before, I like presenting completed outfits when possible.  I paired the jumps with a chemise and petticoat(s) and a small bum pad

from other costumes.

DSCN0861 DSCN0862

You can see the hand stitching around the edges of the collar.

DSCN0863

Finished jumps/waistcoat, personally, I think that the burgundy twill tape ties really makes the cornflower yellow color pop.


The Challenge: #16 – Terminology – Jumps /Waistcoat

Fabric:  1 1/2 yards of Cornflower yellow cotton purchased in 2010

Pattern: Atwater Kent Museum Friends Historical Association – Philadelphia PA

Year: 1740s – 1780s

Notion: Burgundy Twill Tape – 1 yard 3/4 inch wide

Historically Accurate: The pattern is historically accurate, 70% sewn by hand

Hours to complete: 1 week

First worn: not yet

Total Cost:  $4.00


Historical Sew Fortnightly Challenge #15 – The Great Outdoors

For this challenge I choose the outdoor sport of golf. The following were my inspiration images:

#15  1905 Women wearing  Golfing Outfit -straw boater hats - HSF Challenge # 15 - The Great Outdoors                  #15  1908 Golfing Outfit

I particularly liked this photo of a group of women checking their golf scores.  This photo was taken around 1905.  The red plaid skirt and vest was posted by The Vintage Traveler, it dates from 1908.

1903 Women's Golf Outfit

This photo dates from 1903.  I selected these photos because they were all had similar golfing outfits, A-line full walking skirt, vest, and or jacket, tie, hat. As you can see for about five years the basic fashion outfit for a lady golfer didn’t change that much.  All of the images were obtained from a simple Google search.


DSCN0823 DSCN0824 DSCN0825

I completed the vest for this golfing outfit for challenge #14.  For this challenge, I started with the full walking skirt.  I wanted to use or adapt a pattern that I already owned.  I choose the New Look pattern #6433, for the simple reason it contained a full A-line skirt that contained the fullness needed for the 1905 skirt.  I simply needed to extend the length and add a waistband.

Since, I did not plan to line this skirt, I wanted a nice seam finish. So, I decided to attempt a French seam finish for the skirt seams.  I had a vague idea how they worked, but I checked online and found several tutorials which all basically provided the same step by step information. Several suggested sewing a 3/8 inch seam first, than trimming that seam to an 1/8 inch seam.  I didn’t really want to do this.  I kept searching and I found a set of instructions that suggested sewing a 1/4 or 2/8 inch seam first, this way, you will not have to trim the seam.  the final seam should be 3/8 inch and will enclose the 2/8 inch initial seam completely.  This worked beautifully for me.  These seams were very long, so I decided to really take my time and keep the machine at a nice even slow pace.  That really worked.


DSCN0827 DSCN0828

The finished golfing outfit circa 1905.  The skirt is polished cotton which I have had for a couple of years, Jomar’s , $1 a yard. The vest was remnant material which I discussed in the previous challenge. I really like out the skirt and vest complete each other.  I wanted to emulate the lady in the center front group photo with the light colored skirt.  Oh, I made a simple tie from the scrap skirt fabric.  The is about 6o inches long and 5 inches wide.  I used iron on interfacing to give it a little extra body, sewed the long sides together with 2/8 seam allowance, turned the tube to the right side.  Placed the seam down the center of the  tube and pressed.  I hand stitched the short ends.  The hat is a simple man’s summer straw hat that I had on hand.  I initially wanted to attempt to make a boater.  But, this hat works.

DSCN0830

A closer look at the outfit.  I just need to add a golf club and we are ready to go golfing.

DSCN0831 DSCN0832

Front and back pics of the outfit on Maude.  The skirt looks brownish in the above pictures, but it is actually a light celery green and matches the vest perfectly.

DSCN0833 DSCN0834

The skirt hem took forever, I initially started to hand hem it, but stopped and machine stitched it as you can see.  Also, I added another picture of the completed French seam.


DSCN0835 DSCN0836

Oh, I added a dark green grosgrain 1 1/2 inch ribbon to the bottom of the skirt hem.  I read that somewhere on another blog and decided to try it.  It does provide the hem with a bit more body and weight.  The next picture is just the hat.

DSCN0827

The Challenge #15: The Great Outdoors – 1905 Lady’s Golfing Outfit

Fabric: Polished Celery Green Cotton, Light Cotton Canvas Celery Green Plaid fabric

Pattern: New Look Pattern #6433, Skirt E, Vest McCalls Patter M5186

Year: 1905

Notions: Dark Green Grosgrain ribbon 1 1/2 inch wide

Historically Accurate: Skirt and vest patterns are not  historical patterns, but they do provide the spirit of the 1905 outfits

Hours to complete,  2 1/2 days for the skirt, but not working on it full-time

First worn: Not yet!

Total cost: $5.00, I purchased the fabric in 2011 for $1 a yard, 5 yards.,

Historical Sew Fortnightly Challenge #14 – Paisley & Plaid

I actually struggled with this one just a bit. I wanted to use a piece paisley fabric that I had. However, it just barely 1 yard. So, in the end I went with the plaid, I had almost 2 yards of the that.   I have made an attempt to use only fabric from stash.  Which I have a lot and 95% of the fabric comes from  one of the local fabric stores in Philadelphia.  It is JOMAR’s it’s my favorite store for fabric.

DSCN0790

The finished vest that I made. It is based on 1903 lady’s vest.  Also, you can see that I hand sewed the buttonholes.  They are not my strong point.  But with everything else, the more that  you do, the better or the more confident in the process that you become.  I must have several PHDs that lack only buttonholes.  I suppose now I will have to go back and complete them.

DSCN0789

The back of the vest, I think  it really came out well.  I tried to match the plaid as best that I could.  I did not cut each piece separately, I know that I should have.  I  pinned the fabric down all over and than laid the pattern down and cut it out 2 pattern pieces at a time.  For the most part it worked.

DSCN0787

Except for the front two pieces, I think that I should have cut those slightly off of the grain line because the  of the plaid.  I am not sure.

DSCN0774

This is close up look at the plaid.  I wish that I had more of this fabric, but as with so many pieces of fabric at Jomar’s,  it was  a remnant.

DSCN0771

I used a modern pattern and slightly modified it to meet the visual needs of the vest.


DSCN0778

Poor Maude, she really leans in this picture.  I still use her. I really need to make a new duct tape double.

DSCN0781

I did not do a bag lining.  I hate having to pull the fabric through the little arm hole at the top of the garment.  So, this time, I made the lining and attached wrong side to wrong side and as you can see in the picture, I pinned the two together and sewed the two layers together with a pick stitch.  I did not attempt to hand sew this in one setting, but completed it in sections.  The front and collar edges first.  Than the next night and arm hole, followed by the other and finally the hem of the vest.  By breaking up the hand sewing, I had a sense of accomplishment without wearing myself with it.  For me that seemed to work and I will employ that method in the future with the hand sewing.

DSCN0782

A look at the insides of the vest.  I used just plain brown cotton which I had on had.  I think that I cut up another UFO to complete the vest.

DSCN0784

A closer look at the inside stitches.  I think next time that I employ this particular hand stitch, I will really try to get the stitches closer and smaller.  They don’t to bad.

DSCN0785

Buttonholes, don’t look to closely at these.  In this picture, you can see the pick stitch on the outside of the garment.

DSCN0787

Challenge #14 – Paisley & Plaid is done

Fabric: 2 yards of plaid remnant fabric

Pattern: Modified McCall’s 5186, Multiple Vest Pattern – I selected view C

Year:  1903 Vest for a lady

Notions: Matching thread for the lining and the outer fabric

Accurate:  I don’t think so, but it looks like a best from the period.

Hours to complete:  The vest proper, completed in a weekend, the hand sewing took all week completing sections at a time.

First worn:  Not yet!

Total cost  $7.98  ($3.99 a yard)


Historical Sew Fortnightly Challenge #13 – Under $10

When this challenge rolled around, I was feeling a bit tired of the challenges. It was my fault for selecting overly complicated projects with multiple parts to be created. In addition, I wanted to show completed outfits for the various challenges. I must admit for this challenge, I wasn’t really inspired. I looked around at my fabric stash and couldn’t come up with anything that I needed or wanted to make.

I initially thought of something Steampunk and I searched the net for inspirational pictures. There was a lot of inspiration, but still nothing that peaked my interest enough to attempt my version of the garment. Then I stumbled across this item:

Steampunk Tulle Inspiration  HSF Challenge # 13 - Under ten Dollars -  Challenge #21 - Redo Google Steampunk costume image.

I liked the play on the little ballerina tutu.  It is actually two pieces, an under ballerina dress with straps and outer jean style corset.  I decided to only go for the ballerina tutu dress.

So here then is my version of the little ballerina skirt:

DSCN0761

It just simple brown netting that I have had in my stash since I first started to sew.  The stash label said 2009, it didn’t have a price per yard.  But, I know at that time I would not have paid more than $1 or $2 per yard. My rationale at the time was that I could afford to make mistakes with cheap fabric.   This I know that I paid a $1 for.  I have paired it with a white square top T-shirt and a steampunk vest that I made  earlier this year for a party.  I know once again, Maude the dress form is leaning.  She always leans. I have given up on trying to get her to stay straight.


DSCN0760 DSCN0766 DSCN0765

Using left over scraps of material, I created a yoke five inches wide, folded up one long side.  I next attached the three yards of netting.  It was 54 inches wide so I folded it in half so that the selvage edges would form the hem.  I suppose  that I could have cut it down some, but I didn’t.  I gathered the netting to the yoke.  Next, I gathered the lining material, 2 yards cut in half lengthwise and sewn together, providing me with four yards of 23 inches in length material.   In between the gathers of netting, I placed the gathers of lining material.  I sew very slowly the three fabrics together.  I pinned the folded edge of the yoke over  gathered edges of netting and lining. I slipped stitched the folded yoke edge over on the inside.  I really like the slip stitch, it provides such a clean neat stitch and you hardly can see it.  I am definitely getting better at it.

DSCN0762 DSCN0763 DSCN0764

The yoke to me looks fabulous.  Now that I know how to make it properly, I will be using this technique more.  I suppose that I could have used more netting. I had more, but I thought that three yards double would have been enough. I like the shininess of the lining material as it shows through  the netting.  It really could be a steampunk outfit with the proper accessories.

DSCN0761


The Challenge: Under $10

Fabric: Lining material -2  yards, Brown English Netting material 3 yards, Scrap material for the yoke

Pattern:  No pattern – just winged it

Year: ?

Notions: None

How historically accurate?:   I don’t know, I did do some hand stitching, does that count?

Hours to complete: 8 hours, all day Saturday

First worn:  Not yet

Total cost:  Scrap material – free, left over from another project.  3 yards netting at $1 yard, 2 yards lining @ $1 yard = $5 total


Historical Fortnightly Challenge #12 – Shape & Support 1880s Bustle

For this challenge, I wanted to do something simple, since the last  several challenges turned out to be  large projects with multiple parts to complete to create the outfit.  So, I decided to create an 1880’s ruffled bustle that help make that era’s silhouette so distinctive.  There are countless ways to create these bustles, I decided to see how just using left over fabric  from previous projects and some gathered trim would work.


HPIM2126

The completed bustle without the batting.  I like it this way as well.


HPIM2115

There wasn’t a particular pattern that I used.  I just looked at several pictures from the era and created my own version.

HPIM2116

I drew in the lines for the gathered  trim that I planned to use.   I had just about five yards left. The ruffles for me needed to be added prior to seaming the two sides together.

I suppose you could do it after the sides have been joined, but I thought it made it a bit easier to sew the ruffles on a flat piece of fabric.

HPIM2117

I believe that I spaced the ruffle lines about 3 1/2 inches apart.  I started with the bottom gathered row first and worked my way up the fabric piece.

HPIM2118

Placed the two right sides together and stitched around the edges.  I made sure that I didn’t catch the ruffles in the seams.

HPIM2119

Notice how the ruffles are already making the side stick out just a bit. After stitching the two sides together, I turned them right side out and fluffed the ruffles.

HPIM2120

I used some ribbon that I had on hand as a binding tie.

HPIM2124


HPIM2125

But, I was going for the big butt  image of the 1880s, so I had to add some batting and it worked.


DSCN0736

With the batting the bustle really sticks out quite a bit.  As you can see from this side image.

DSCN0737

Back image of the bustle, also looks good.


DSCN0739

This is how the bustle looks with a 1880s petticoat added to Maude. You can just detect the bustle. It has compacted some with the petticoat, but not a lot.


DSCN0740

Here’s a picture of the bustle with the petticoat and an outer skirt, a PHD, It still retains the big butt shape that I wanted.


DSCN0742

Front view of Maude, she really is leaning in this picture. It’s done the 1880s bustle.

The Challenge = #12 Shape and Support

Fabric :  remnants

Year:  1880s

Notions: About five yards of 5 inch wide trim and 2 yards of ribbon

Historically Accurate:  I don’t know, I would image that ladies of that era would have done something similar to create their bustles.

Hours to Complete:  All day Saturday, about 8 hours

First worn: Not worn yet

Total cost:  Zero, everything came from the stash