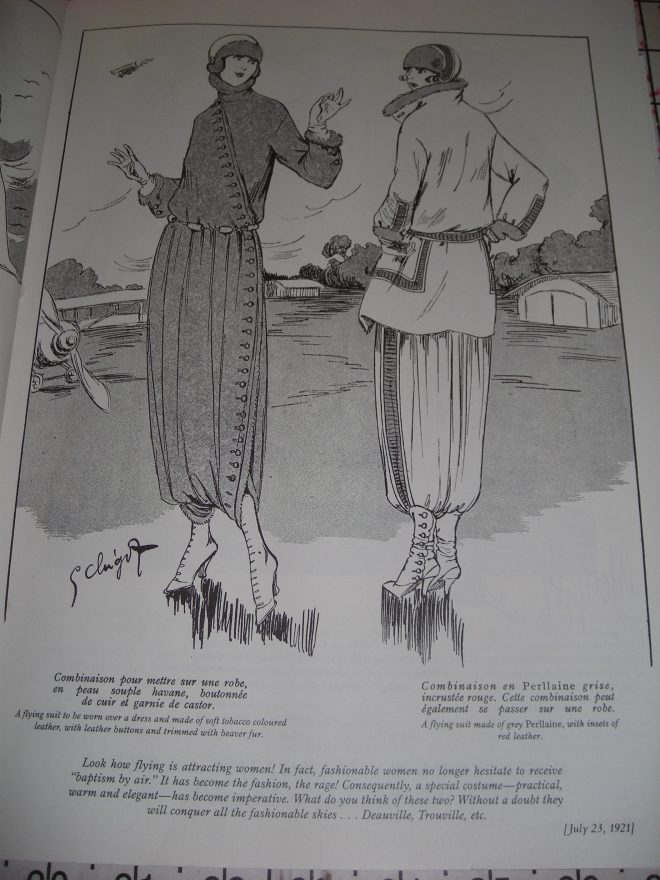
I decided to enter the Historical Sew Monthly Challenge for June, Travel. My inspiration costume for this challenge came from the book “Authentic French Fashion of the Twenties, 413 Costume Designs from “L’Art Et La Mode”” edited by JoAnne Olian. Initially, I have had my heart set on recreating the Flight suit from page 25, but I simply could not find the appropriate fabric from my stash. Also, I think that I really over thought the entire costume process for this 1921 suit, making it way more complicated than it needed to be.
So, I needed to rethink the travel costume that I needed to make. The book contains tons of great costume recreation ideas. On page 61, I found the travel suit which became my ultimate inspiration for this challenge.
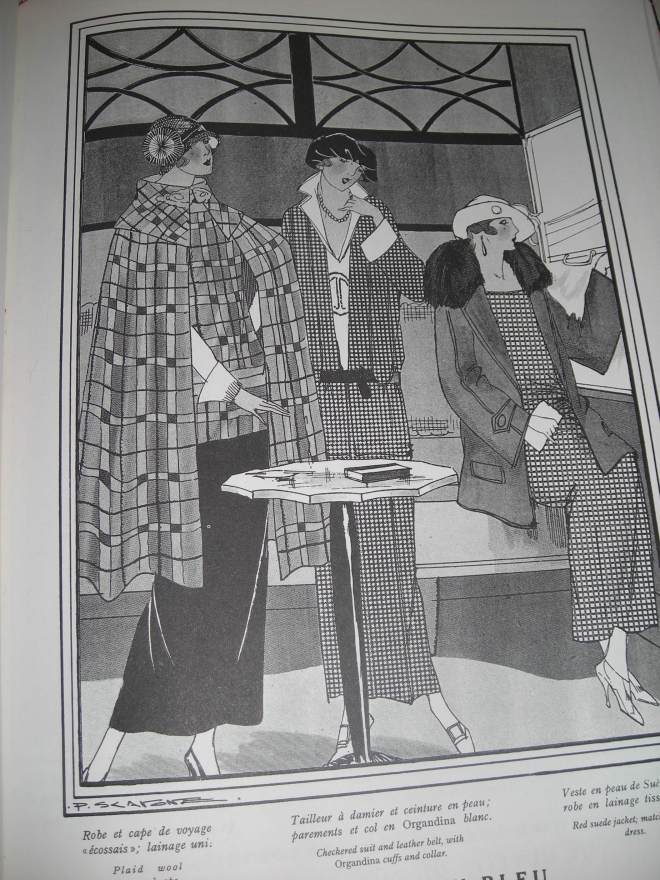
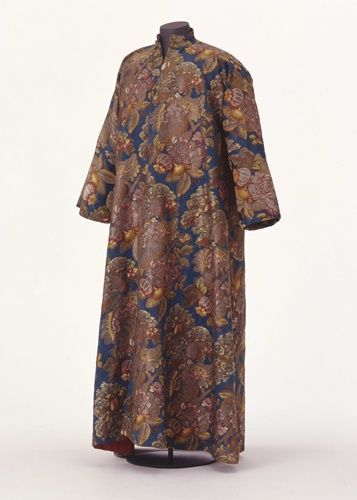
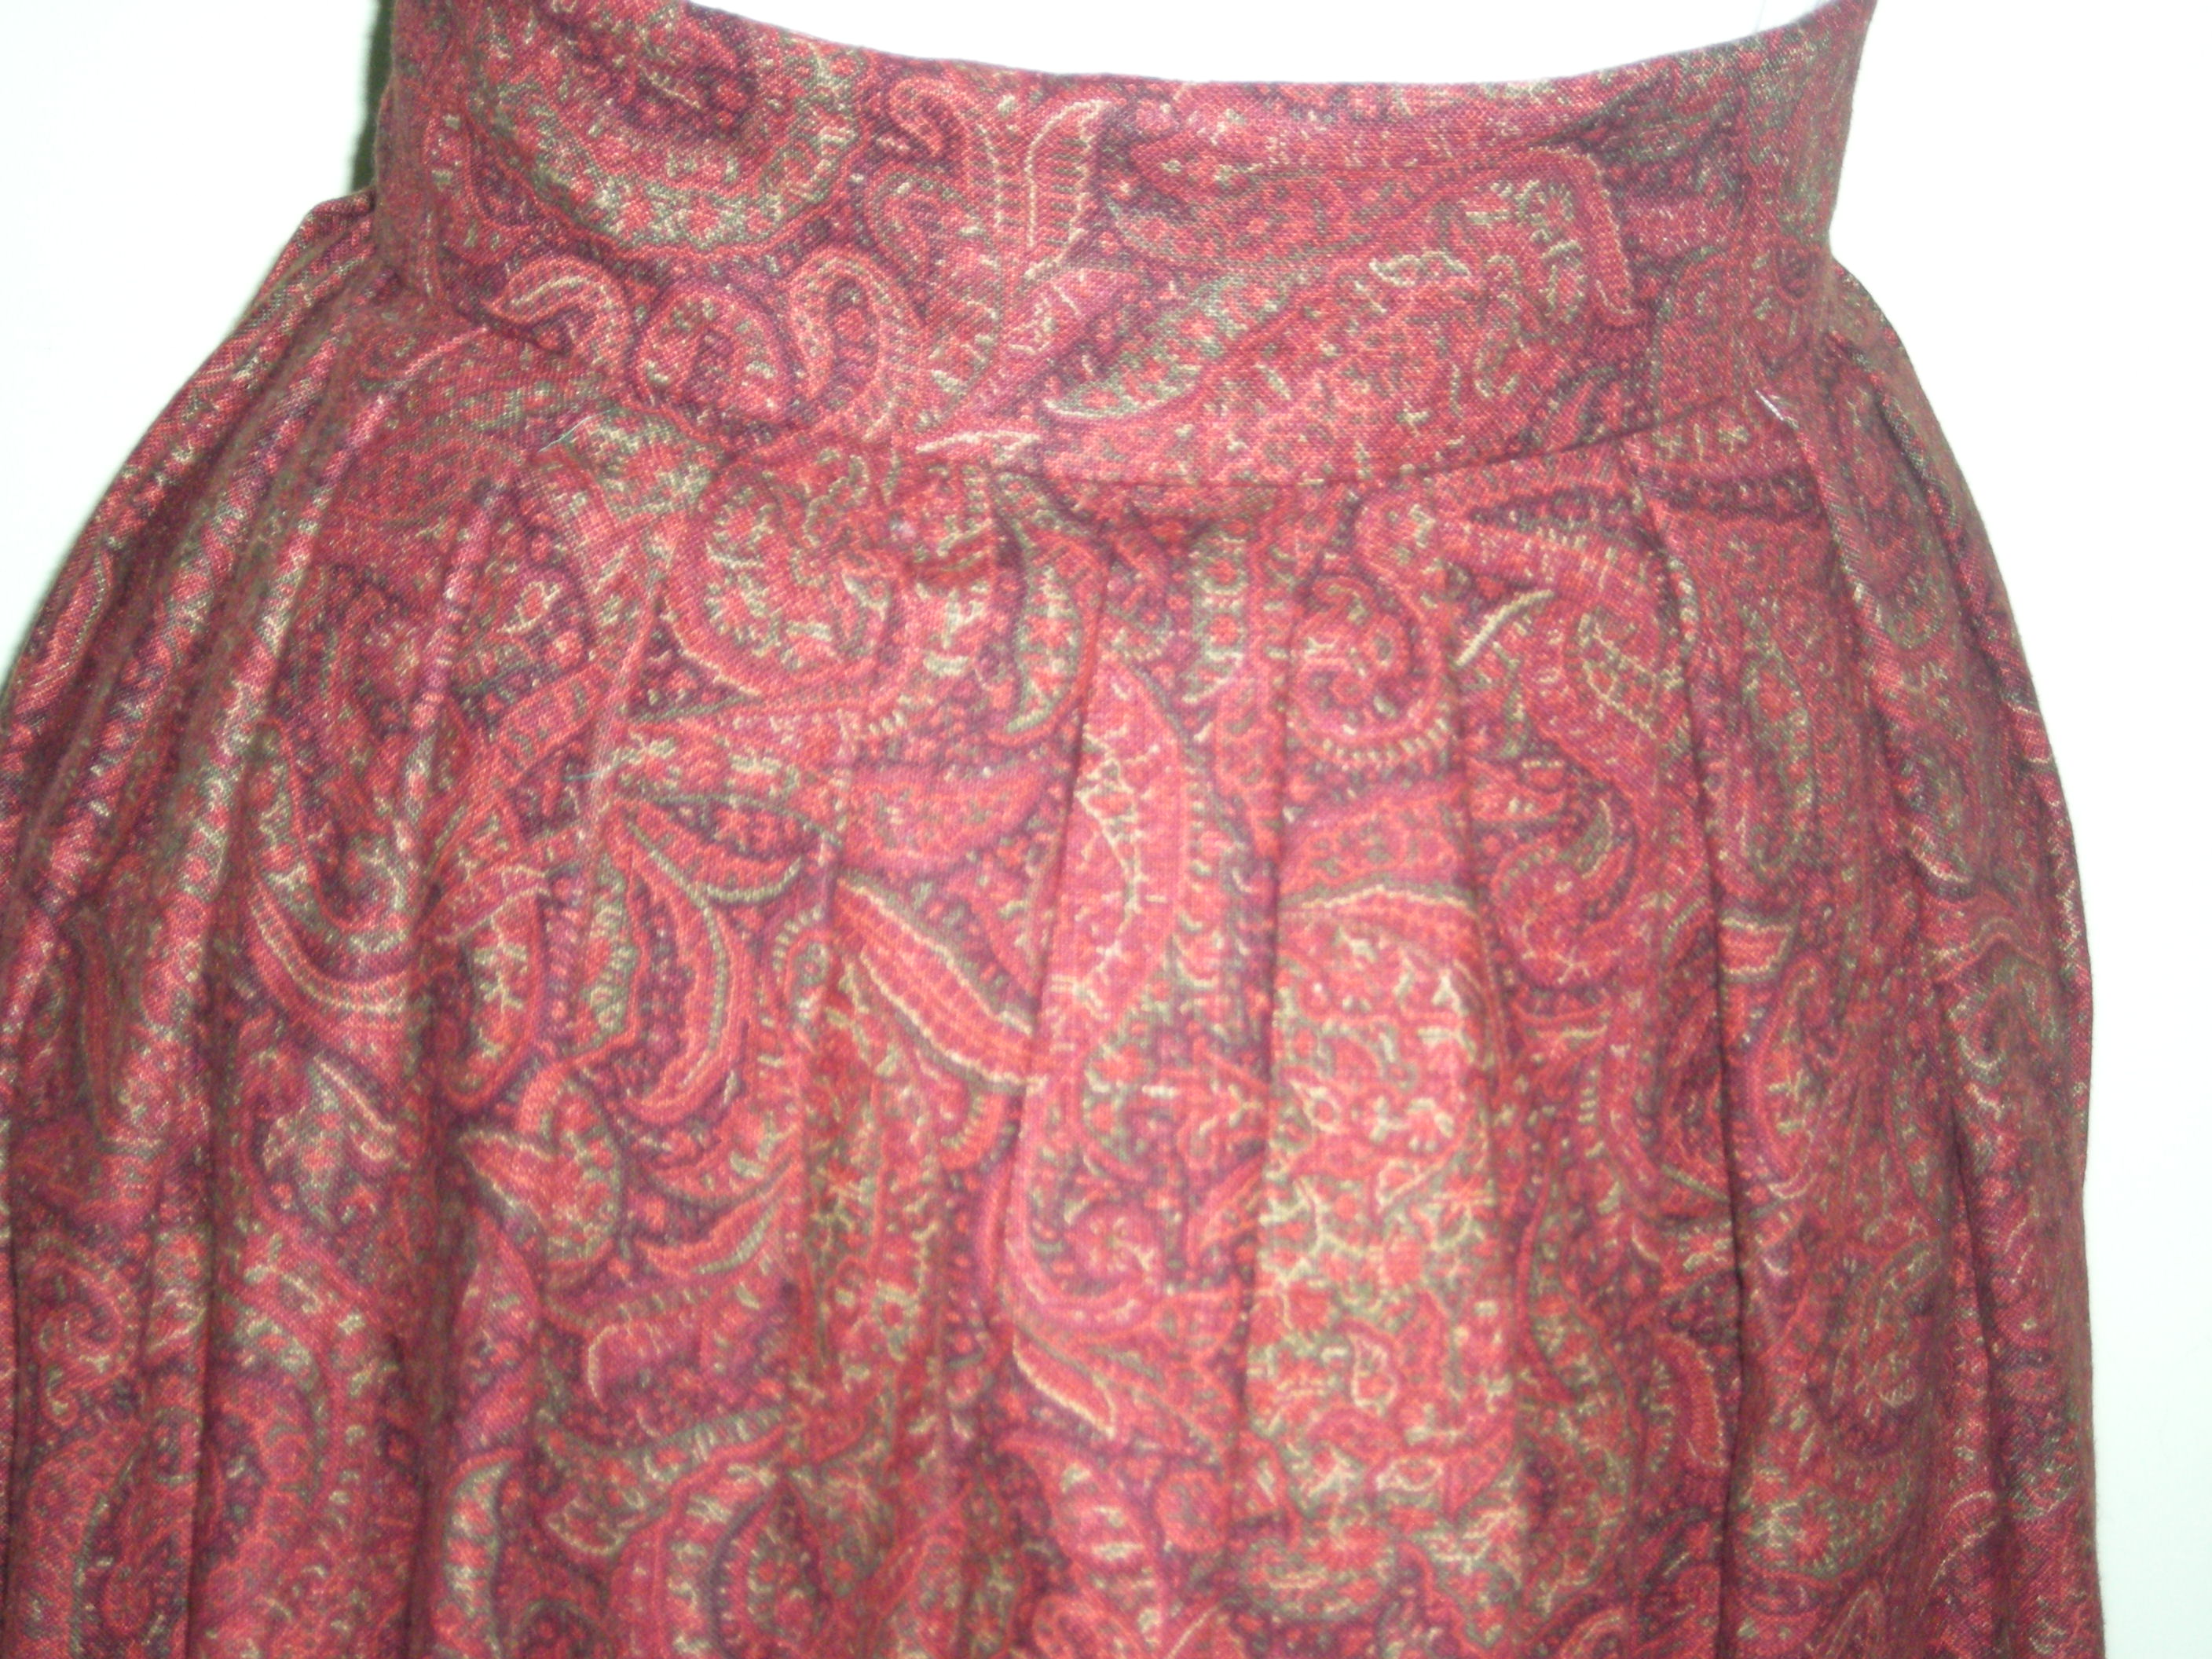
I decided to make the plaid cape suit for train travel. I have had the book for a number of years, but I have never attempted to make anything from the book before. I knew that I had several pieces of plaid material in my stash. In addition, I didn’t think that I would need lots of yardage since from the picture I could use two different complimentary fabrics. The bodice and the cape would be plaid and skirt portion another fabric.


You can clearly see the capture at the bottom of the page depicting the outfits, On the Train Bleu and year was 1923. I realize that most people when they think of the 1920s usually conjure images of the short skirted, fringe wearing, bobbed hair flapper. For me, I have always liked the early 20s where the dresses were a bit longer. In this picture, you can see that skirts of all three images hit just about at the ankle or perhaps just a little higher. Non the less, this was to be my travel costume for the challenge.
Reviewing the picture carefully, I discerned that there were possibly two or three major elements with a couple of supporting accessories. The first was the cape, second was the tunic dress or sheath dress and the third was the under blouse. First up was the cape. I searched online for some free cape patterns, there were tons
I found this pattern from a foreign language fashion pinterest, that I really liked.
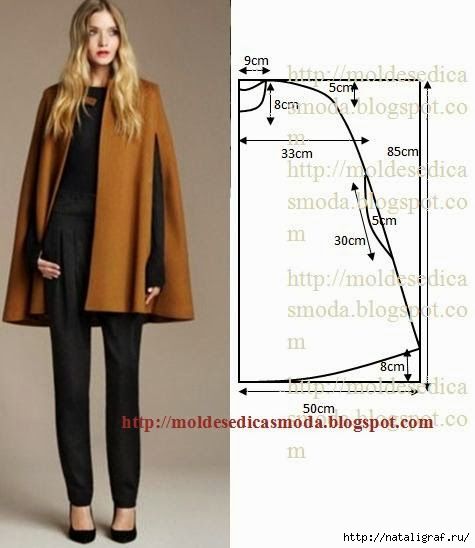
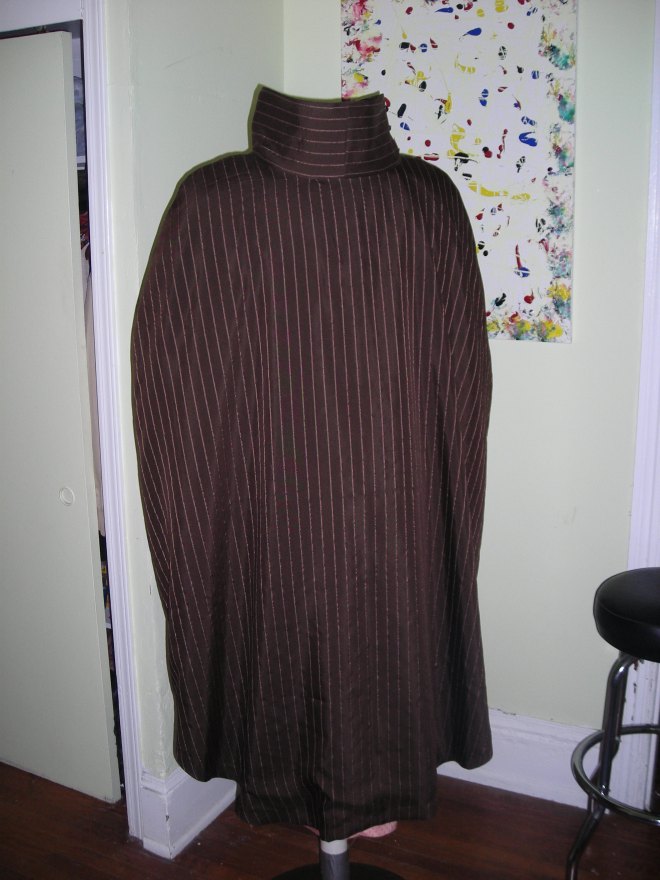
The location is on the picture above. I especially liked the shape, although, it did not match the inspiration picture exactly, it was cape. I knew that I would already need to lengthen the cape and I wasn’t sure if I put the arm slits in or not. A stand up collar was also needed. I definitely needed to make mock up first. Two things that I learned from the mock up, unfortunately, I did not take pictures of this. It appeared to be a simple pattern, I translated the cm to inches and drafted the pattern on paper. I made the mock up with the slits and promptly decided that I didn’t really like the slits, however, this particular design facilitated the cape staying up on the shoulders because of its rounder shape at the shoulders instead of the usual straight shape. I had lengthen the pattern on paper, but, after the mock up, I needed to add just two or three more inches to the hem.
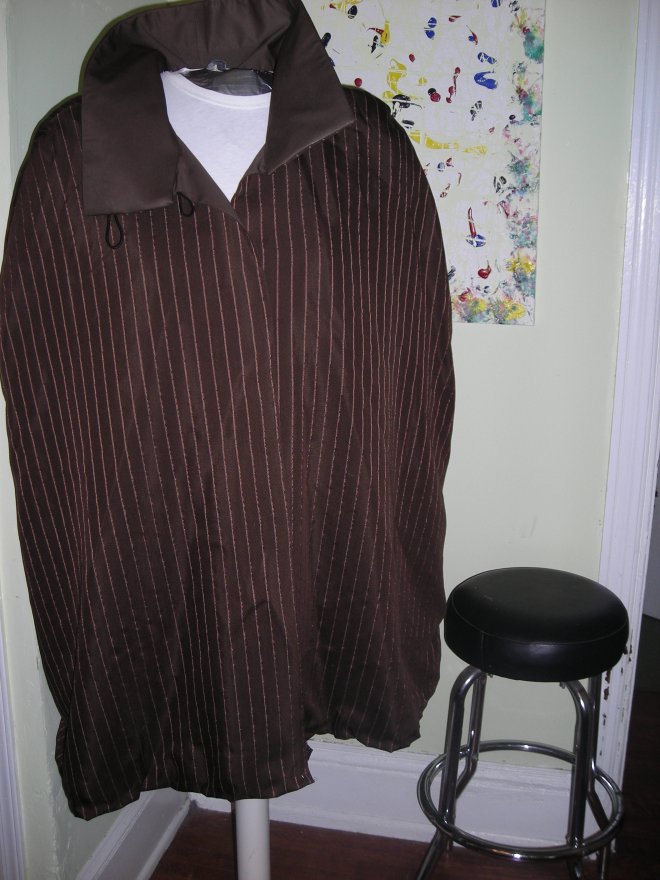
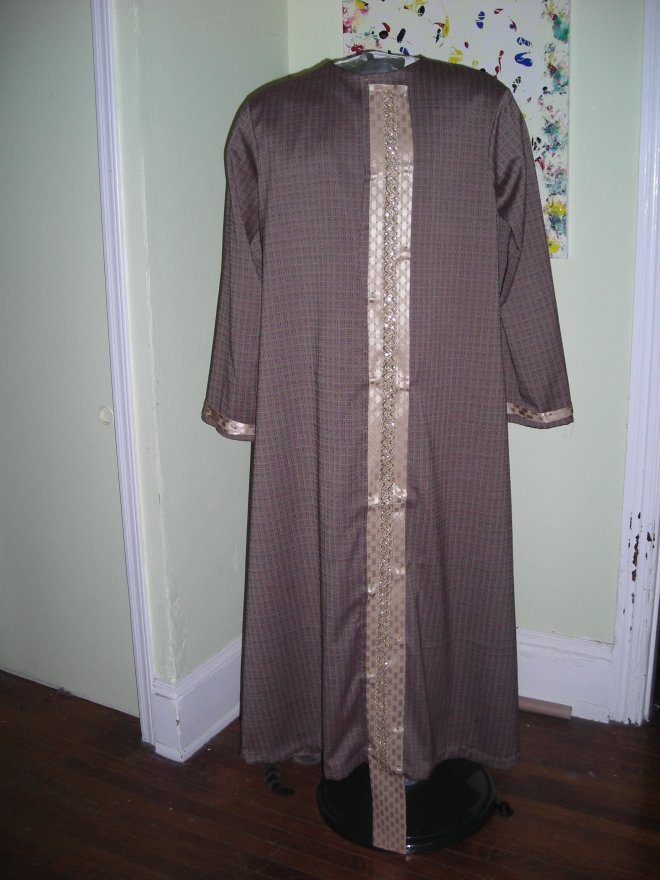
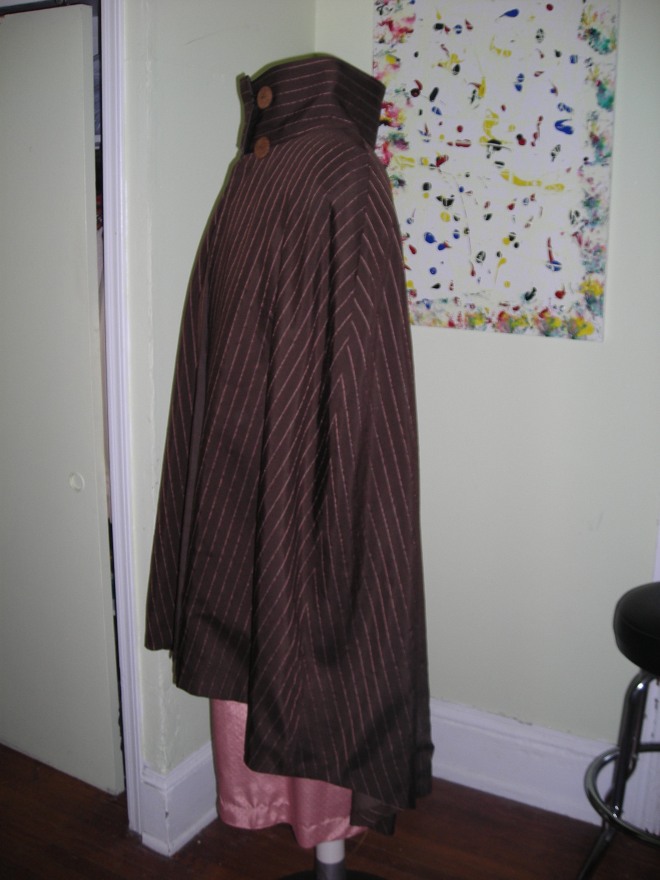
I used some striped brown suiting with rose colored stripes from my stash. I had purchased the fabric in 2013, 4 1/2 yards at $2 a yard. It would be more than enough for the cape and the top/bodice portion of the dress. The collar needed to stand as well and this pattern didn’t come with a collar, but I knew that I could easily add one. I also needed to line the cape. Again from the stash I found this nice brown ombre cotton from 2012, four yards at $1 a yard, perfect.
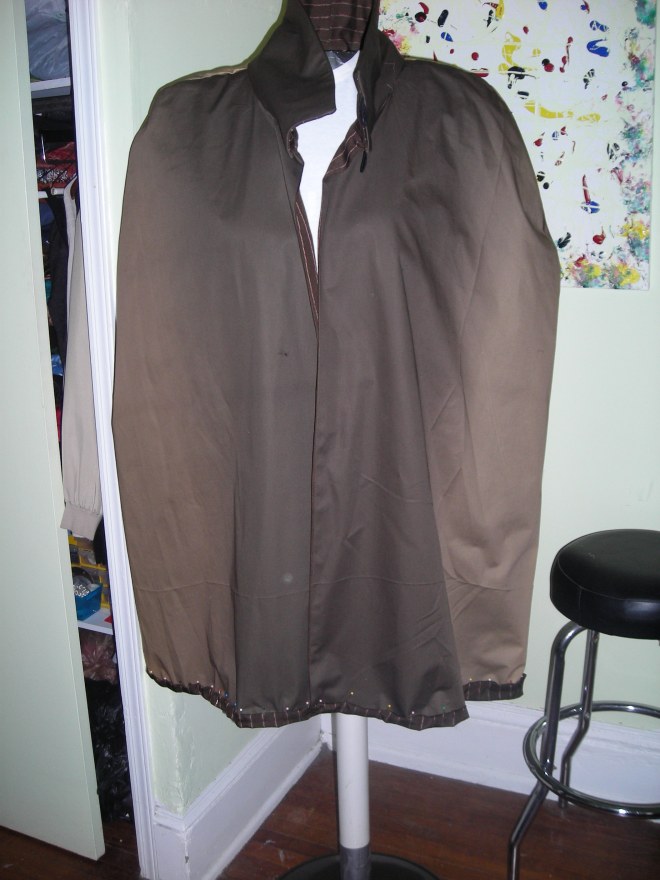
When cutting out the lining fabric, I took 1 1/2 inches off of the bottom, in my mind, this would help with the hem. Actually, I took a bit more off of the hem, after it was pinned and hung for a couple of the days, the cotton lining sagged quite a bit, I cut some more off to help minimize this. There is still a little, but not a lot. I did a bag lining and hand stitched the hem.

Done, I just need to press the hem.
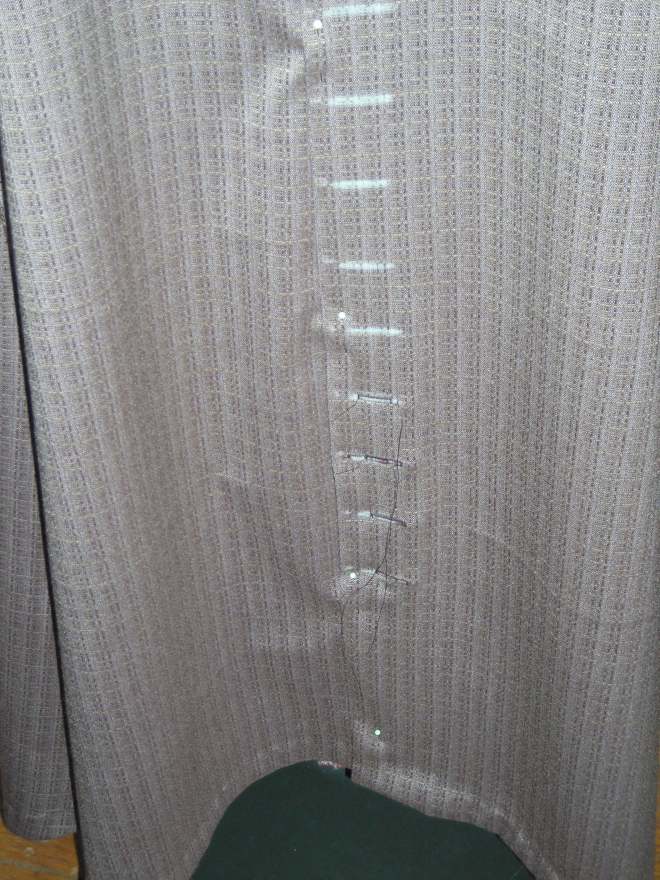
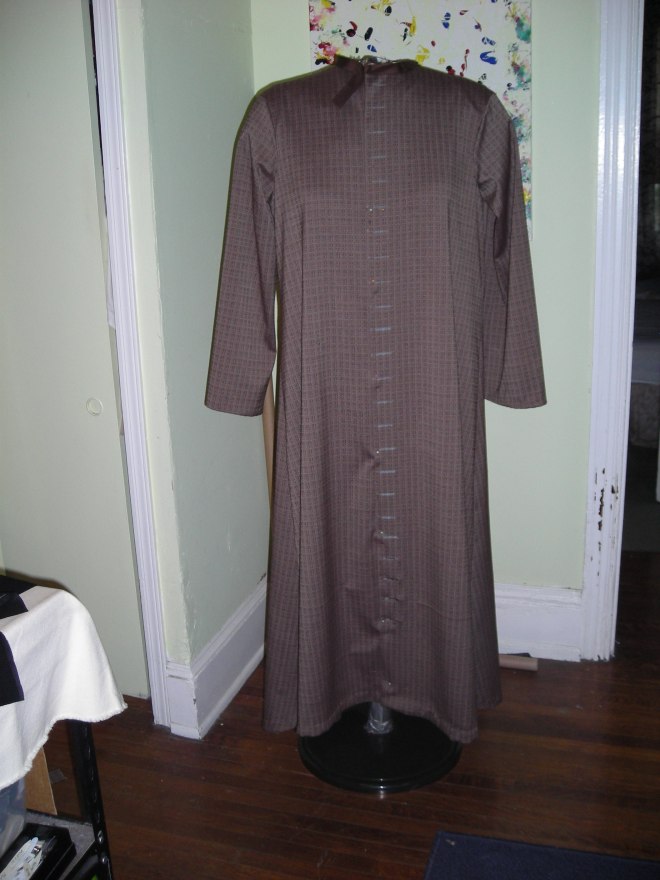
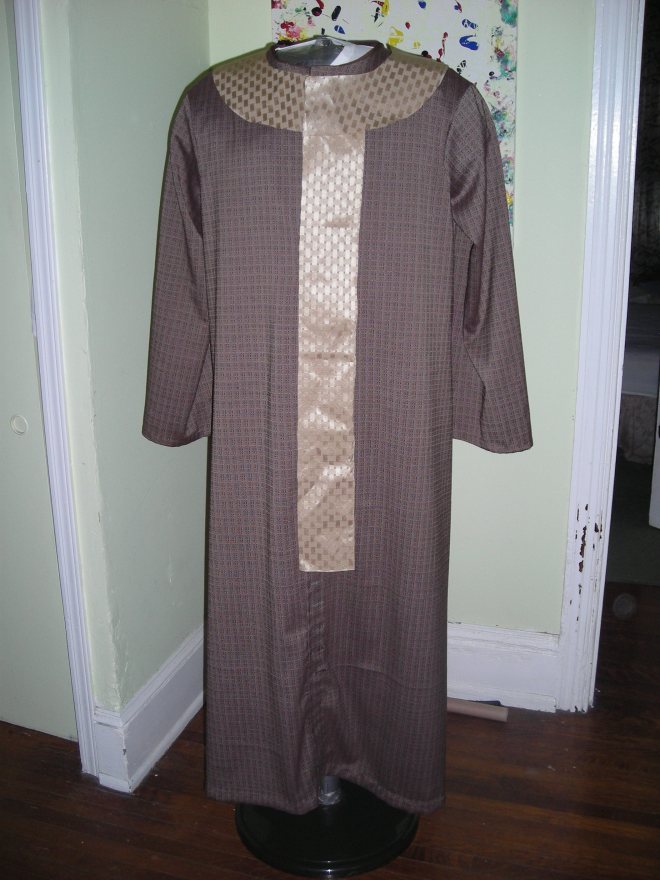
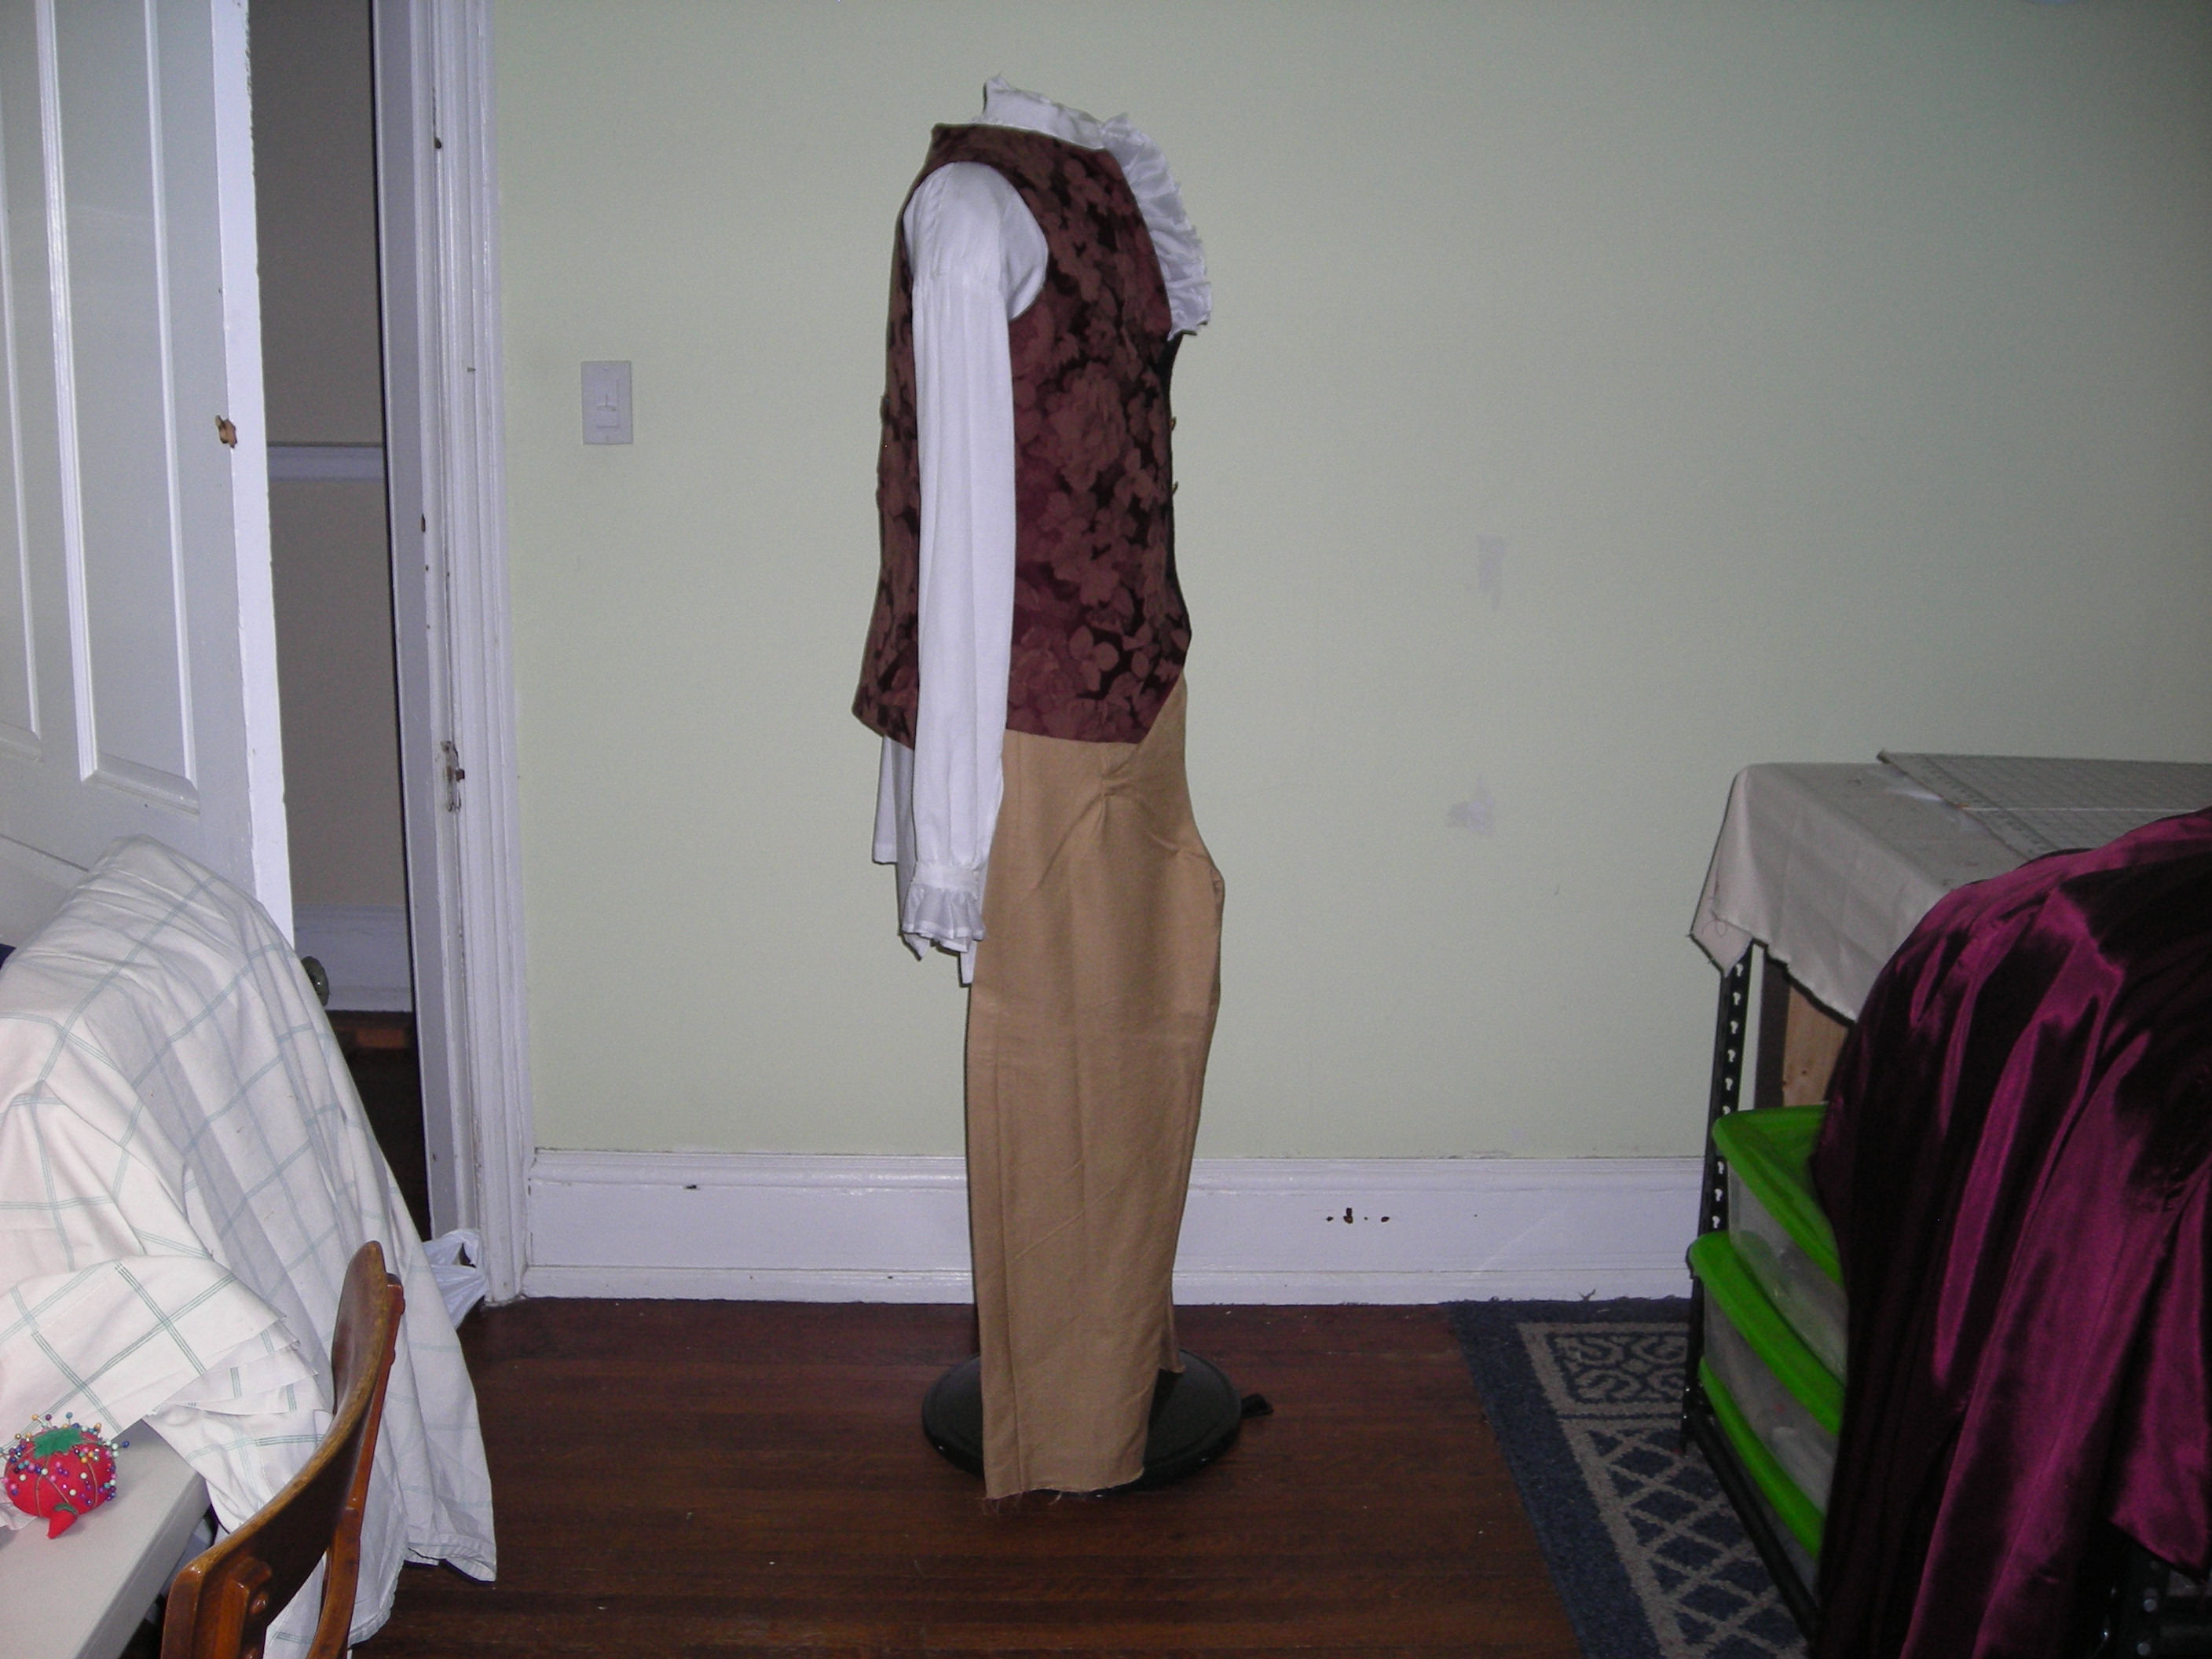
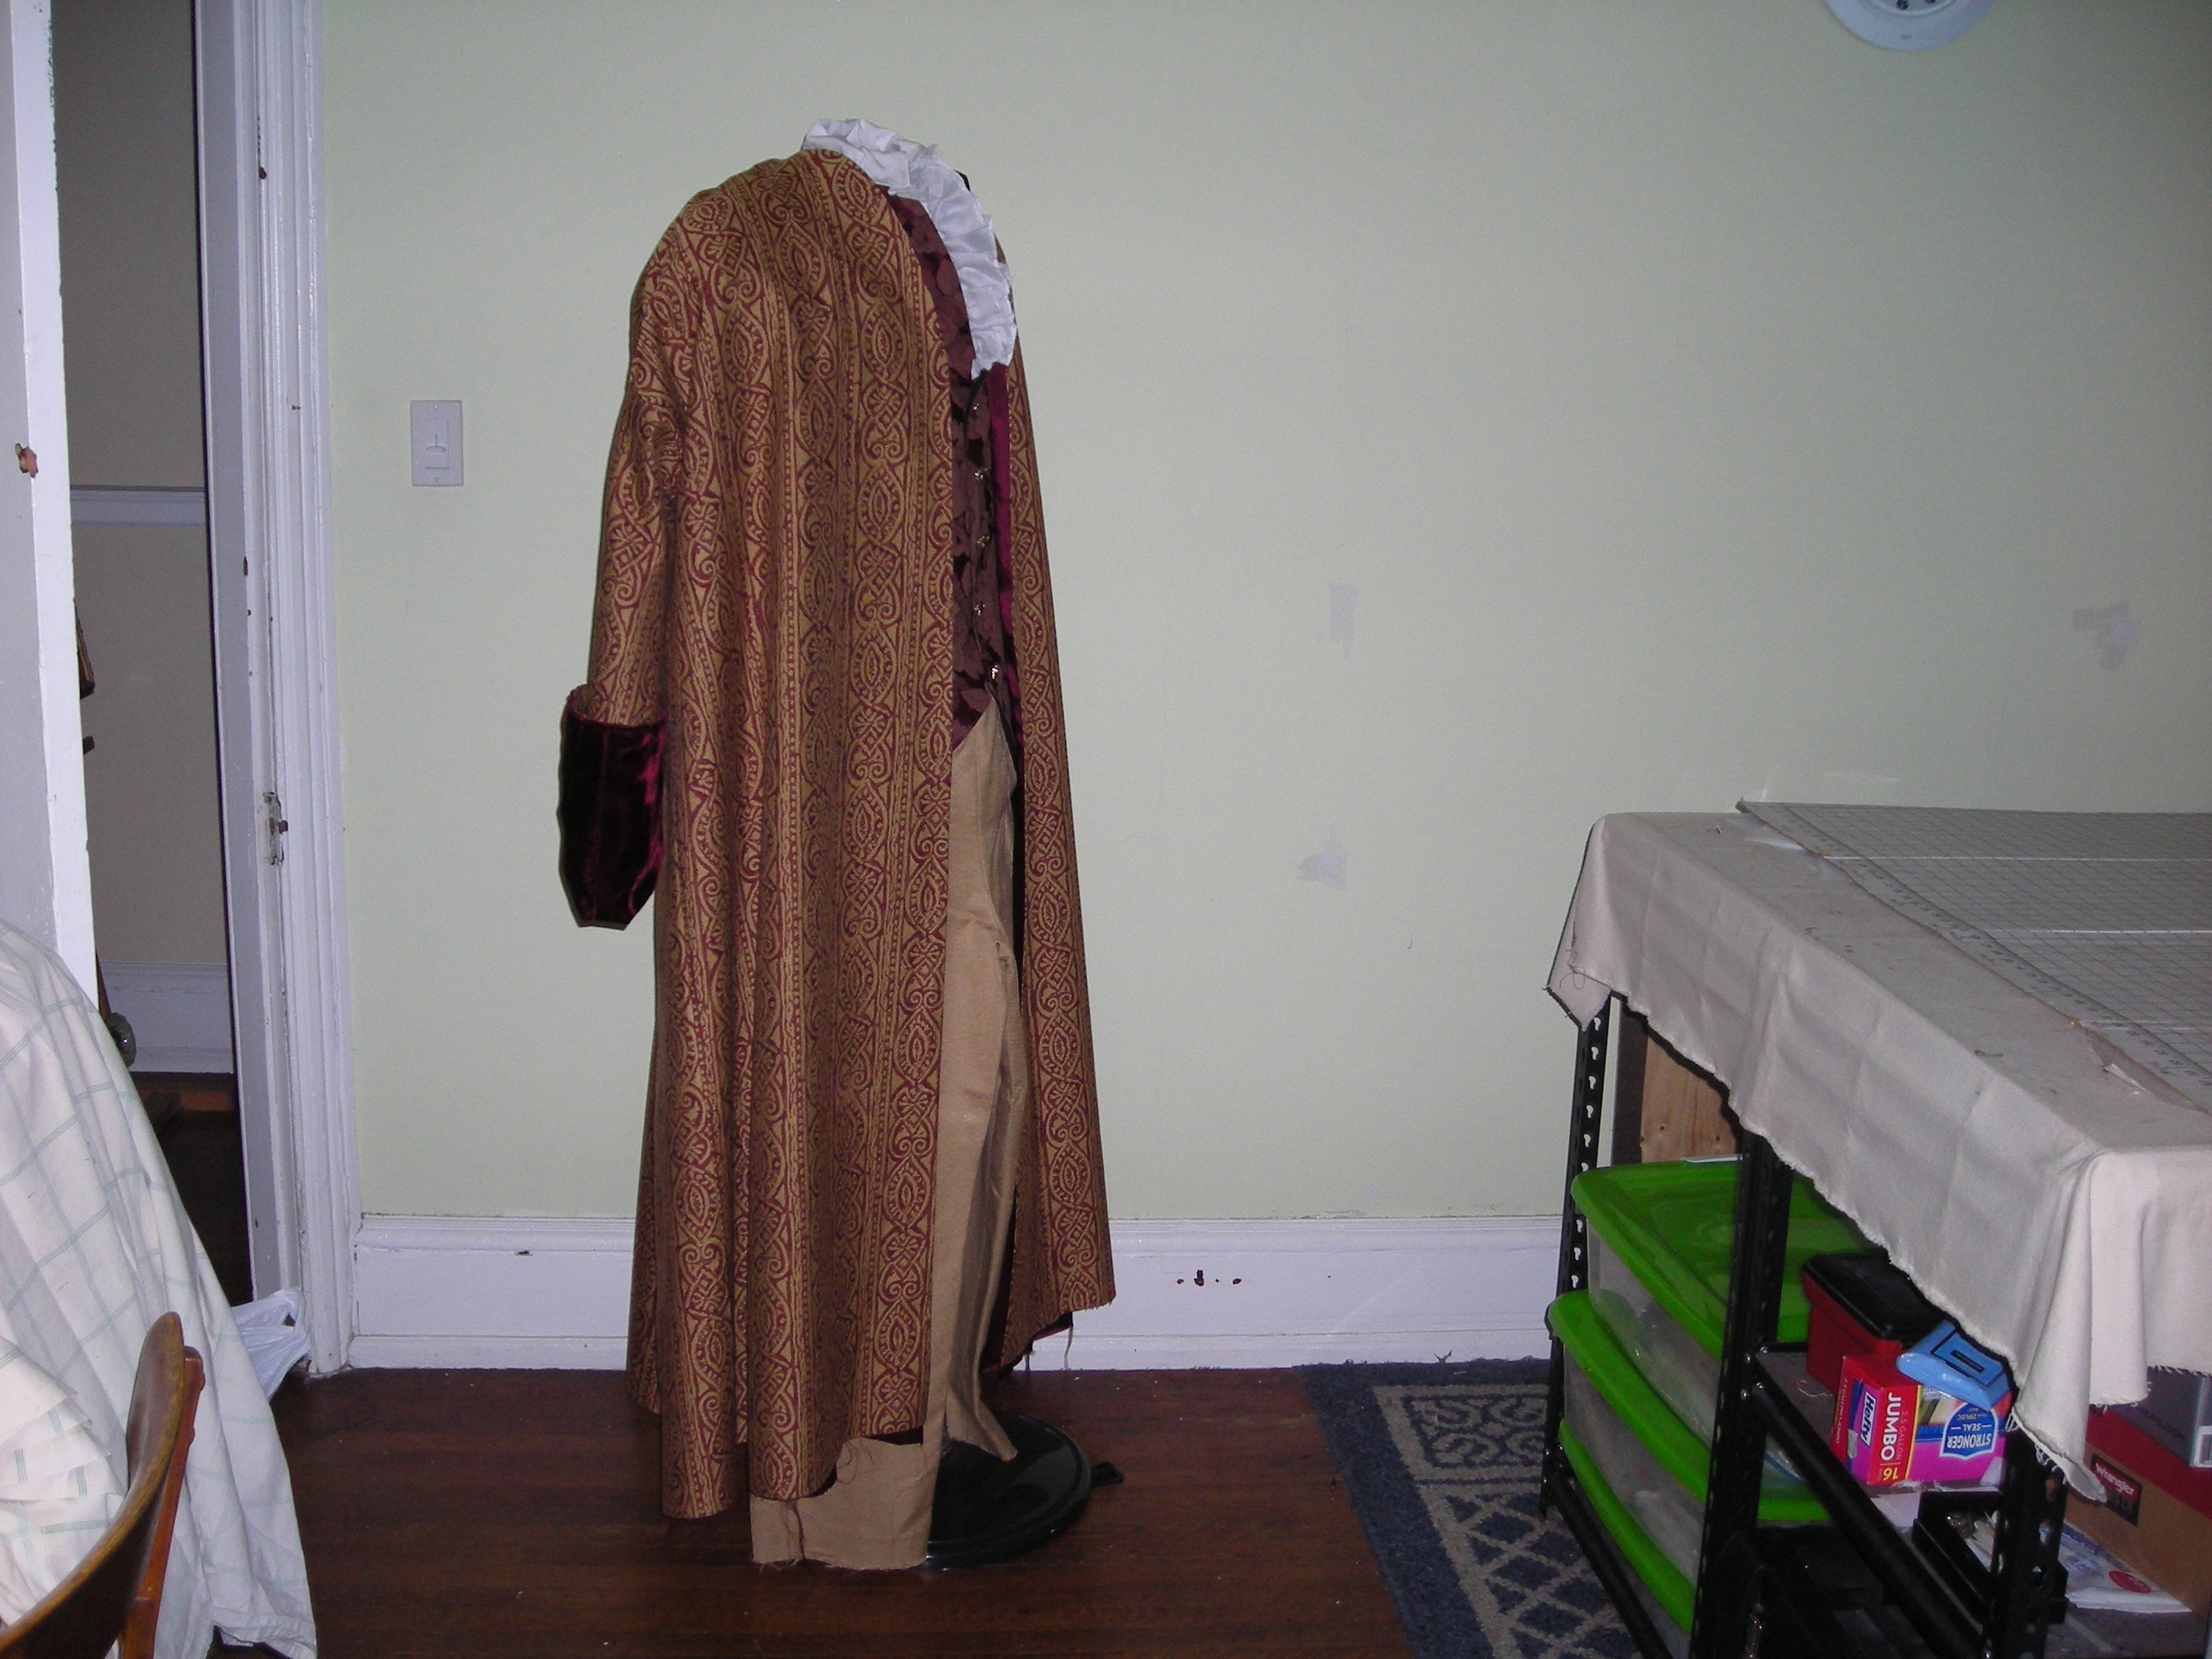
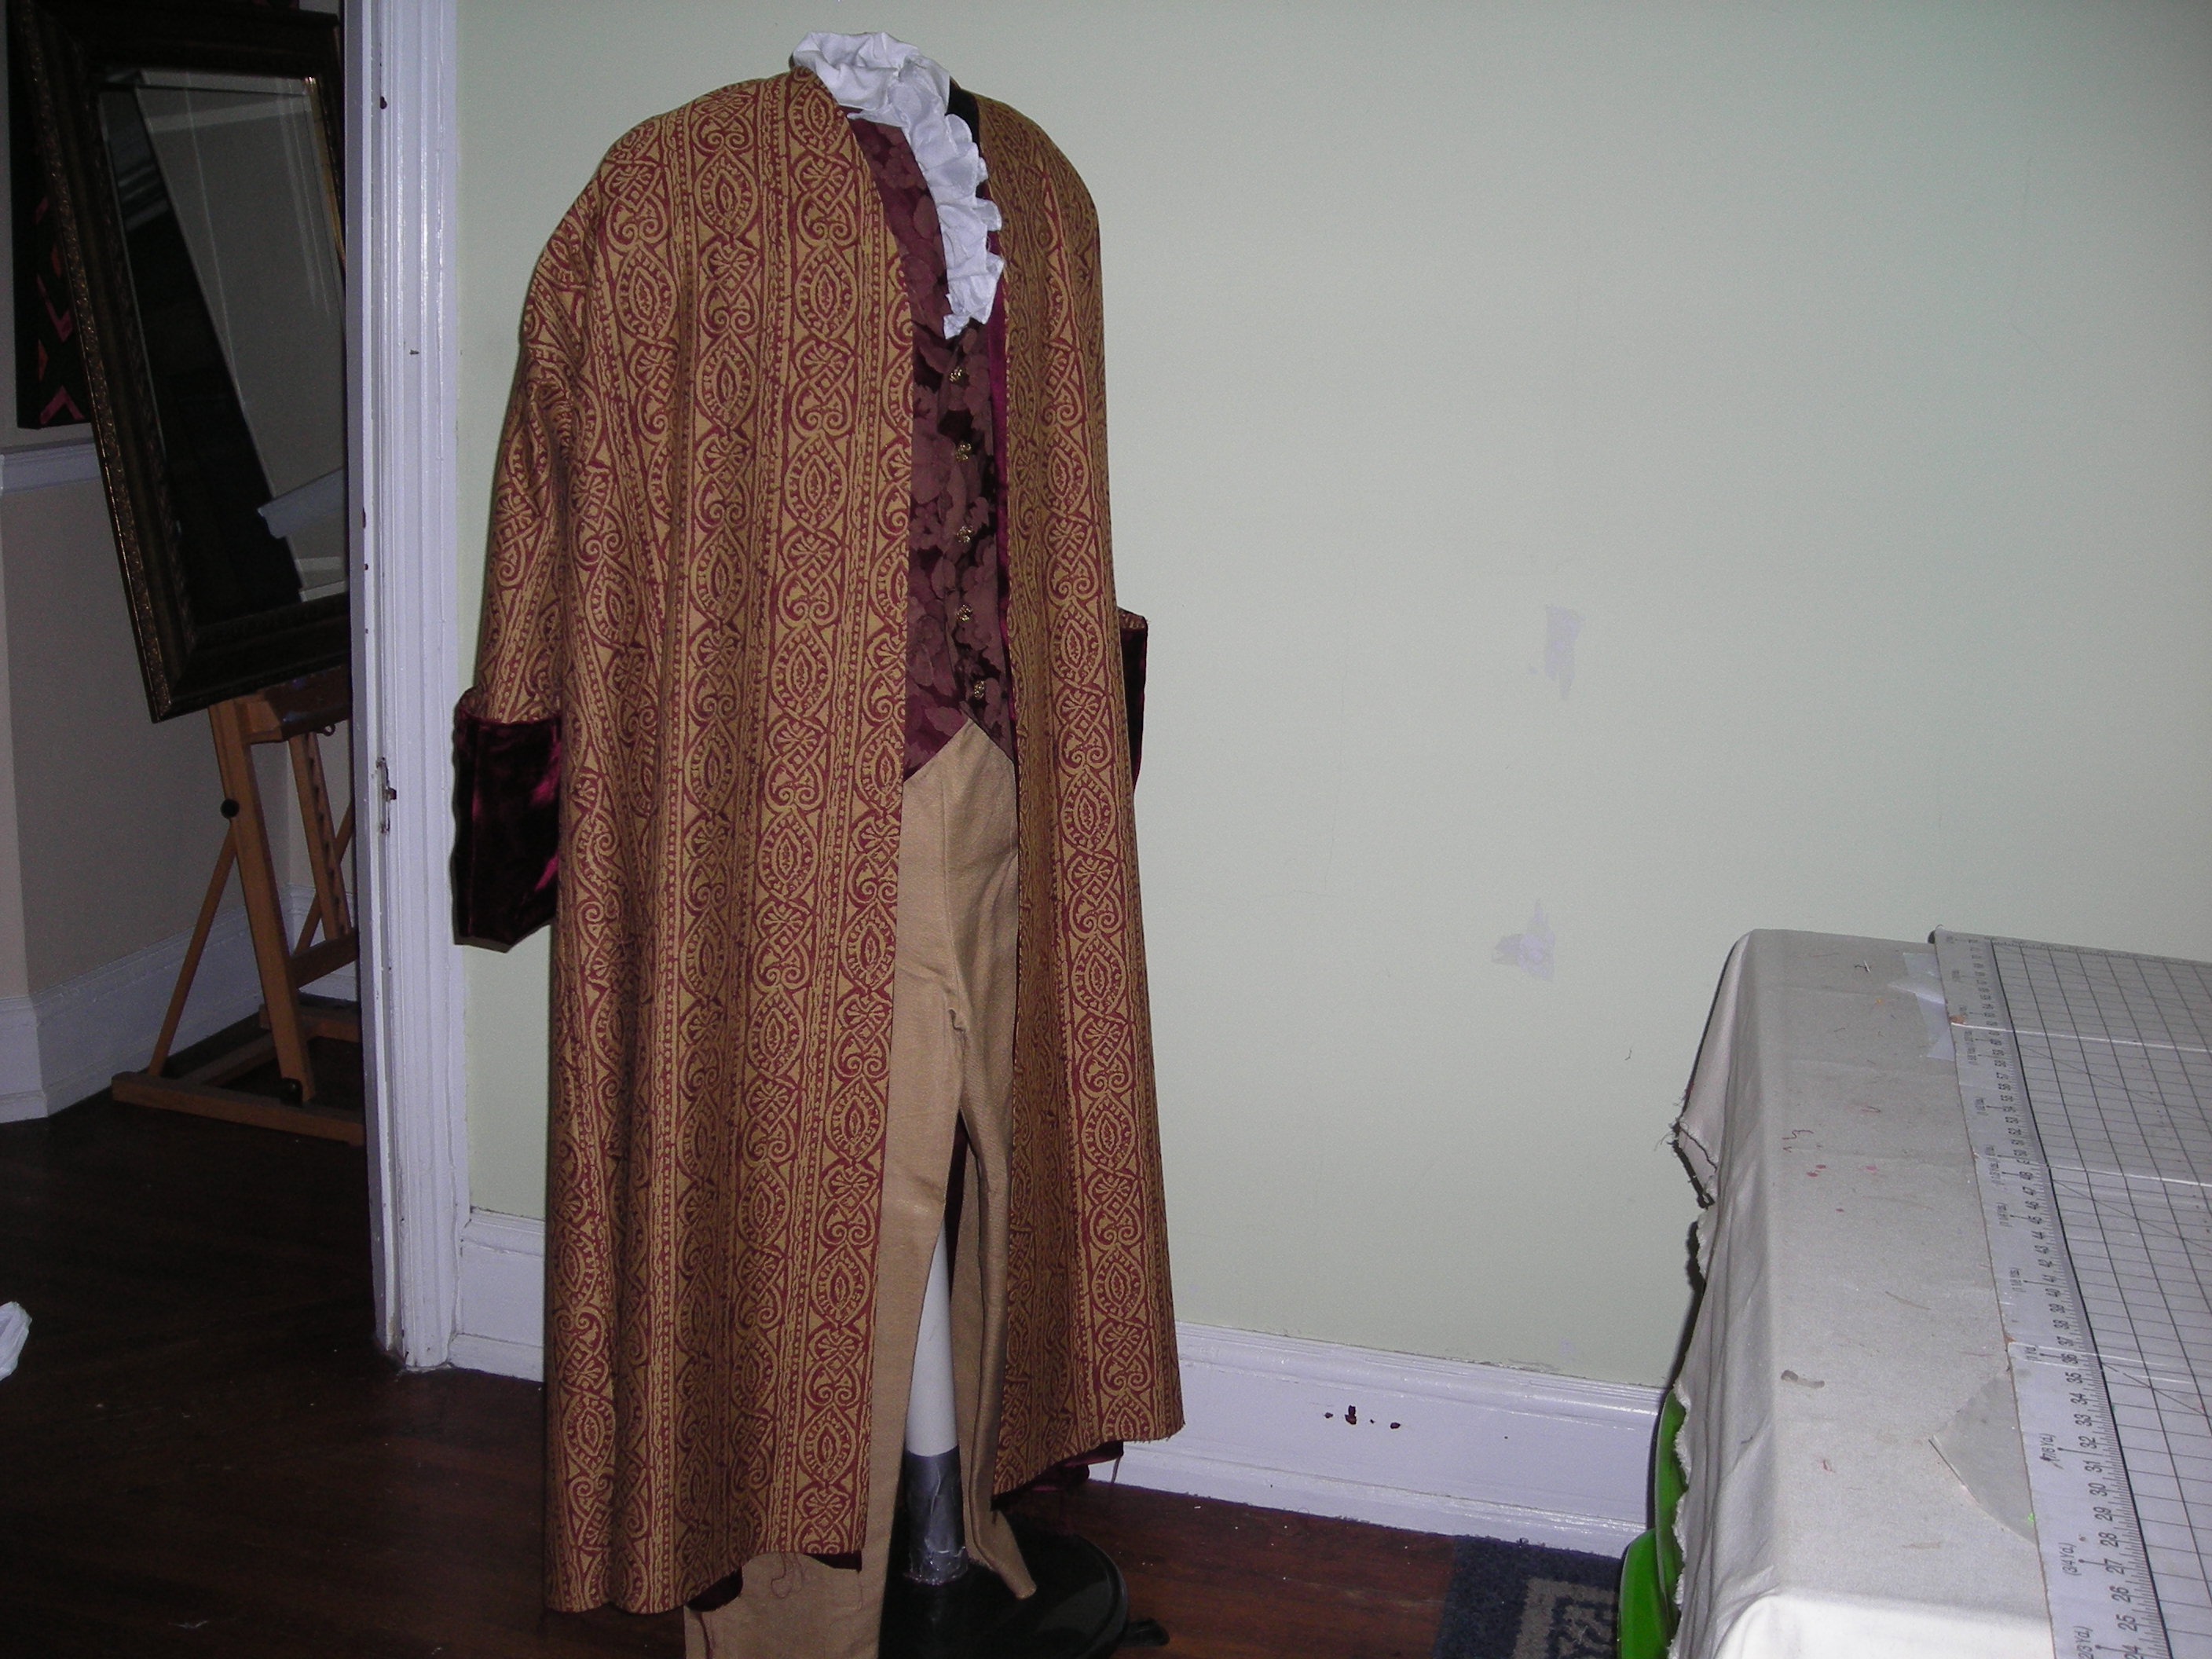
Next up was the bodice portion of the sheath dress. While working on the cape, I decided to minimize the time, I would just add sleeves to the bodice instead of making a separate under blouse which is what I had originally thought to do.
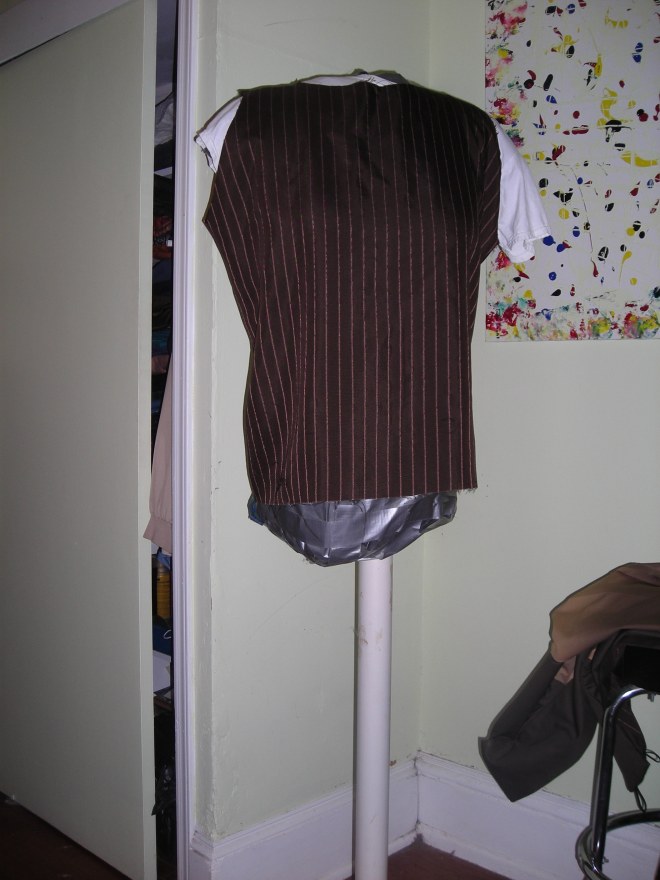
The mock up came out pretty good. The design was correct but it really looked big and full on me and not sleek and column like from the book. Also, I needed to figure out where I wanted the drop waist. Once that was done, I was off to the races. I did take the back in some on the mock up and that helped create the look that I was going for. By doing this, there was a lot less room to get it on over my head, but it wasn’t impossible. It was just snug. Ultimately, I had the effect of the long column that I wanted to create with this 1923 design. The mock up also showed me that there was plenty of room in the skirt leg portion to walk and sit, but because, I had taken it in, there was now less room, I opted to leave a 8 inch vent at the back of the skirt to help facilitate a bit more ease of movement. In addition, the mock up, I sewed two panels together and matched the side seams of the bodice, when I made the skirt of the fashion fabric, I made it from one piece of fabric cut on the fold with the savage edges for the center back seam and for the vent.

I needed to add the sleeves next than, I could insert the bodice lining.


The sleeves went in pretty easily without to much trouble. To my eyes, it was coming together nicely. I realized by the time that I got to this point that I did not want to participate in the remaining historical monthly challenges. Since, I would not continue, I would enter the challenge for just one challenge. Don’t get me wrong , I had already figured out what the next six challenge costumes would be. I just didn’t want to participate any more. I knew I needed to finish this one and not have it become another unfinished project.
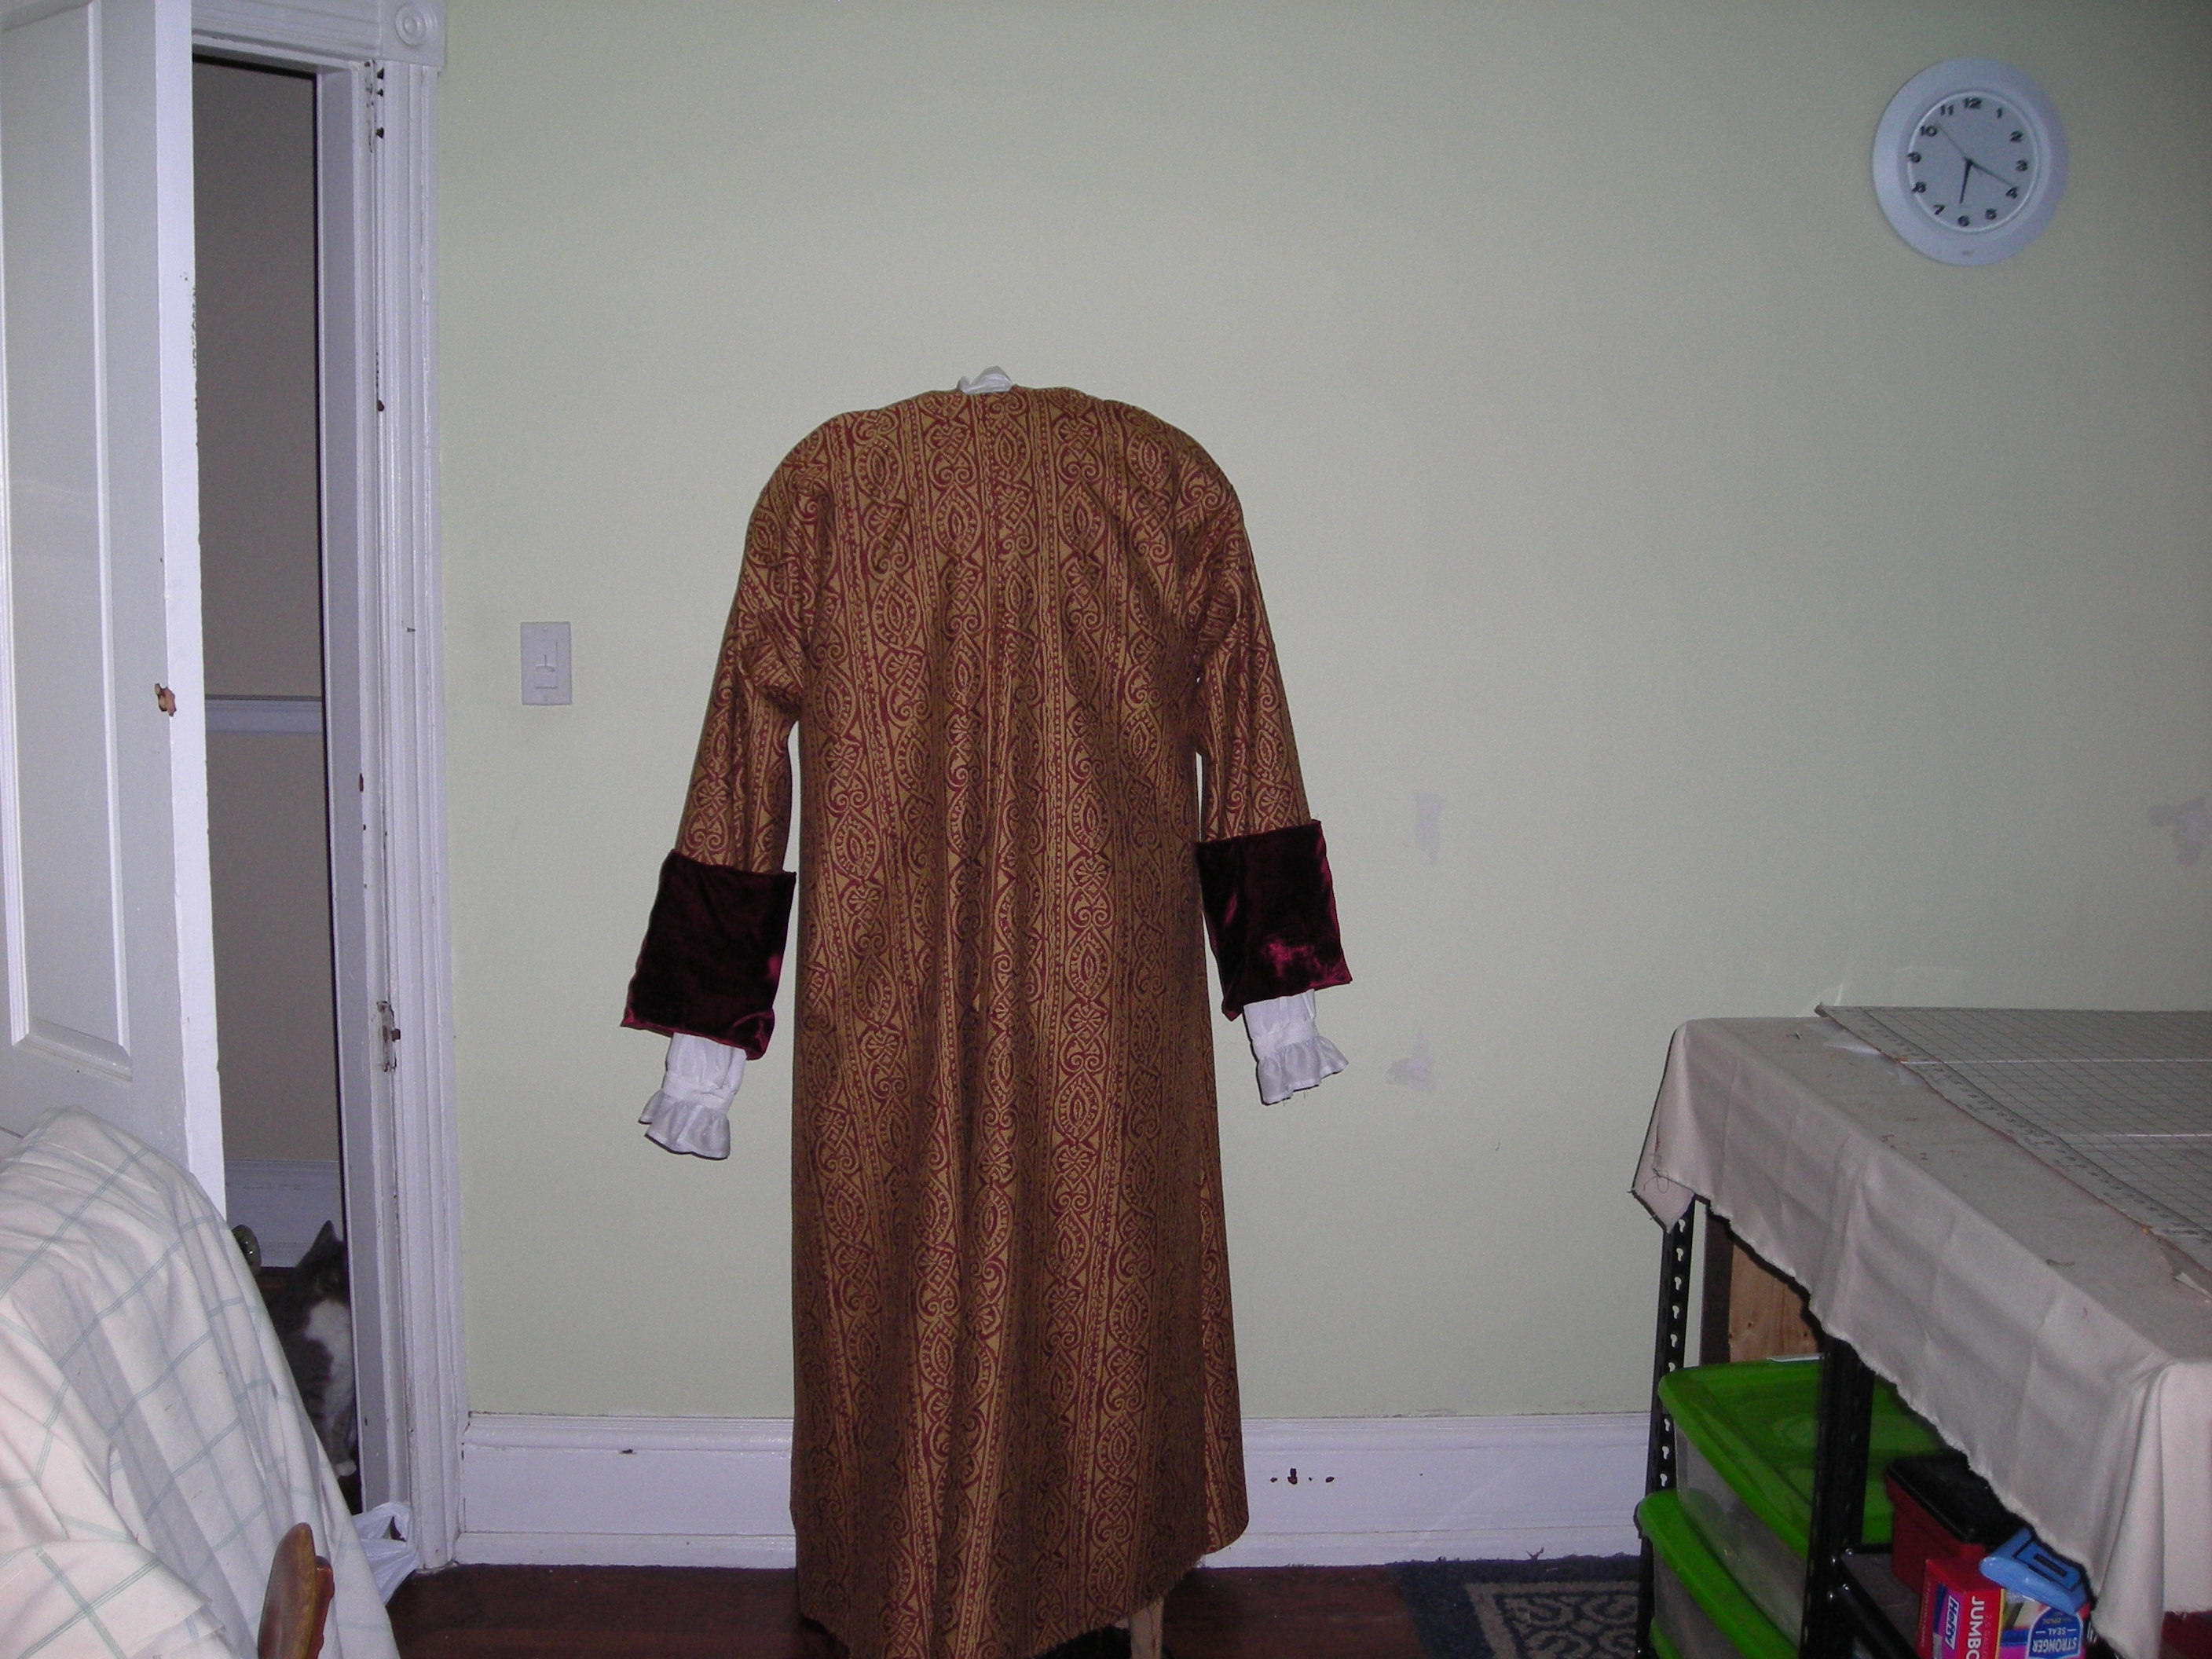
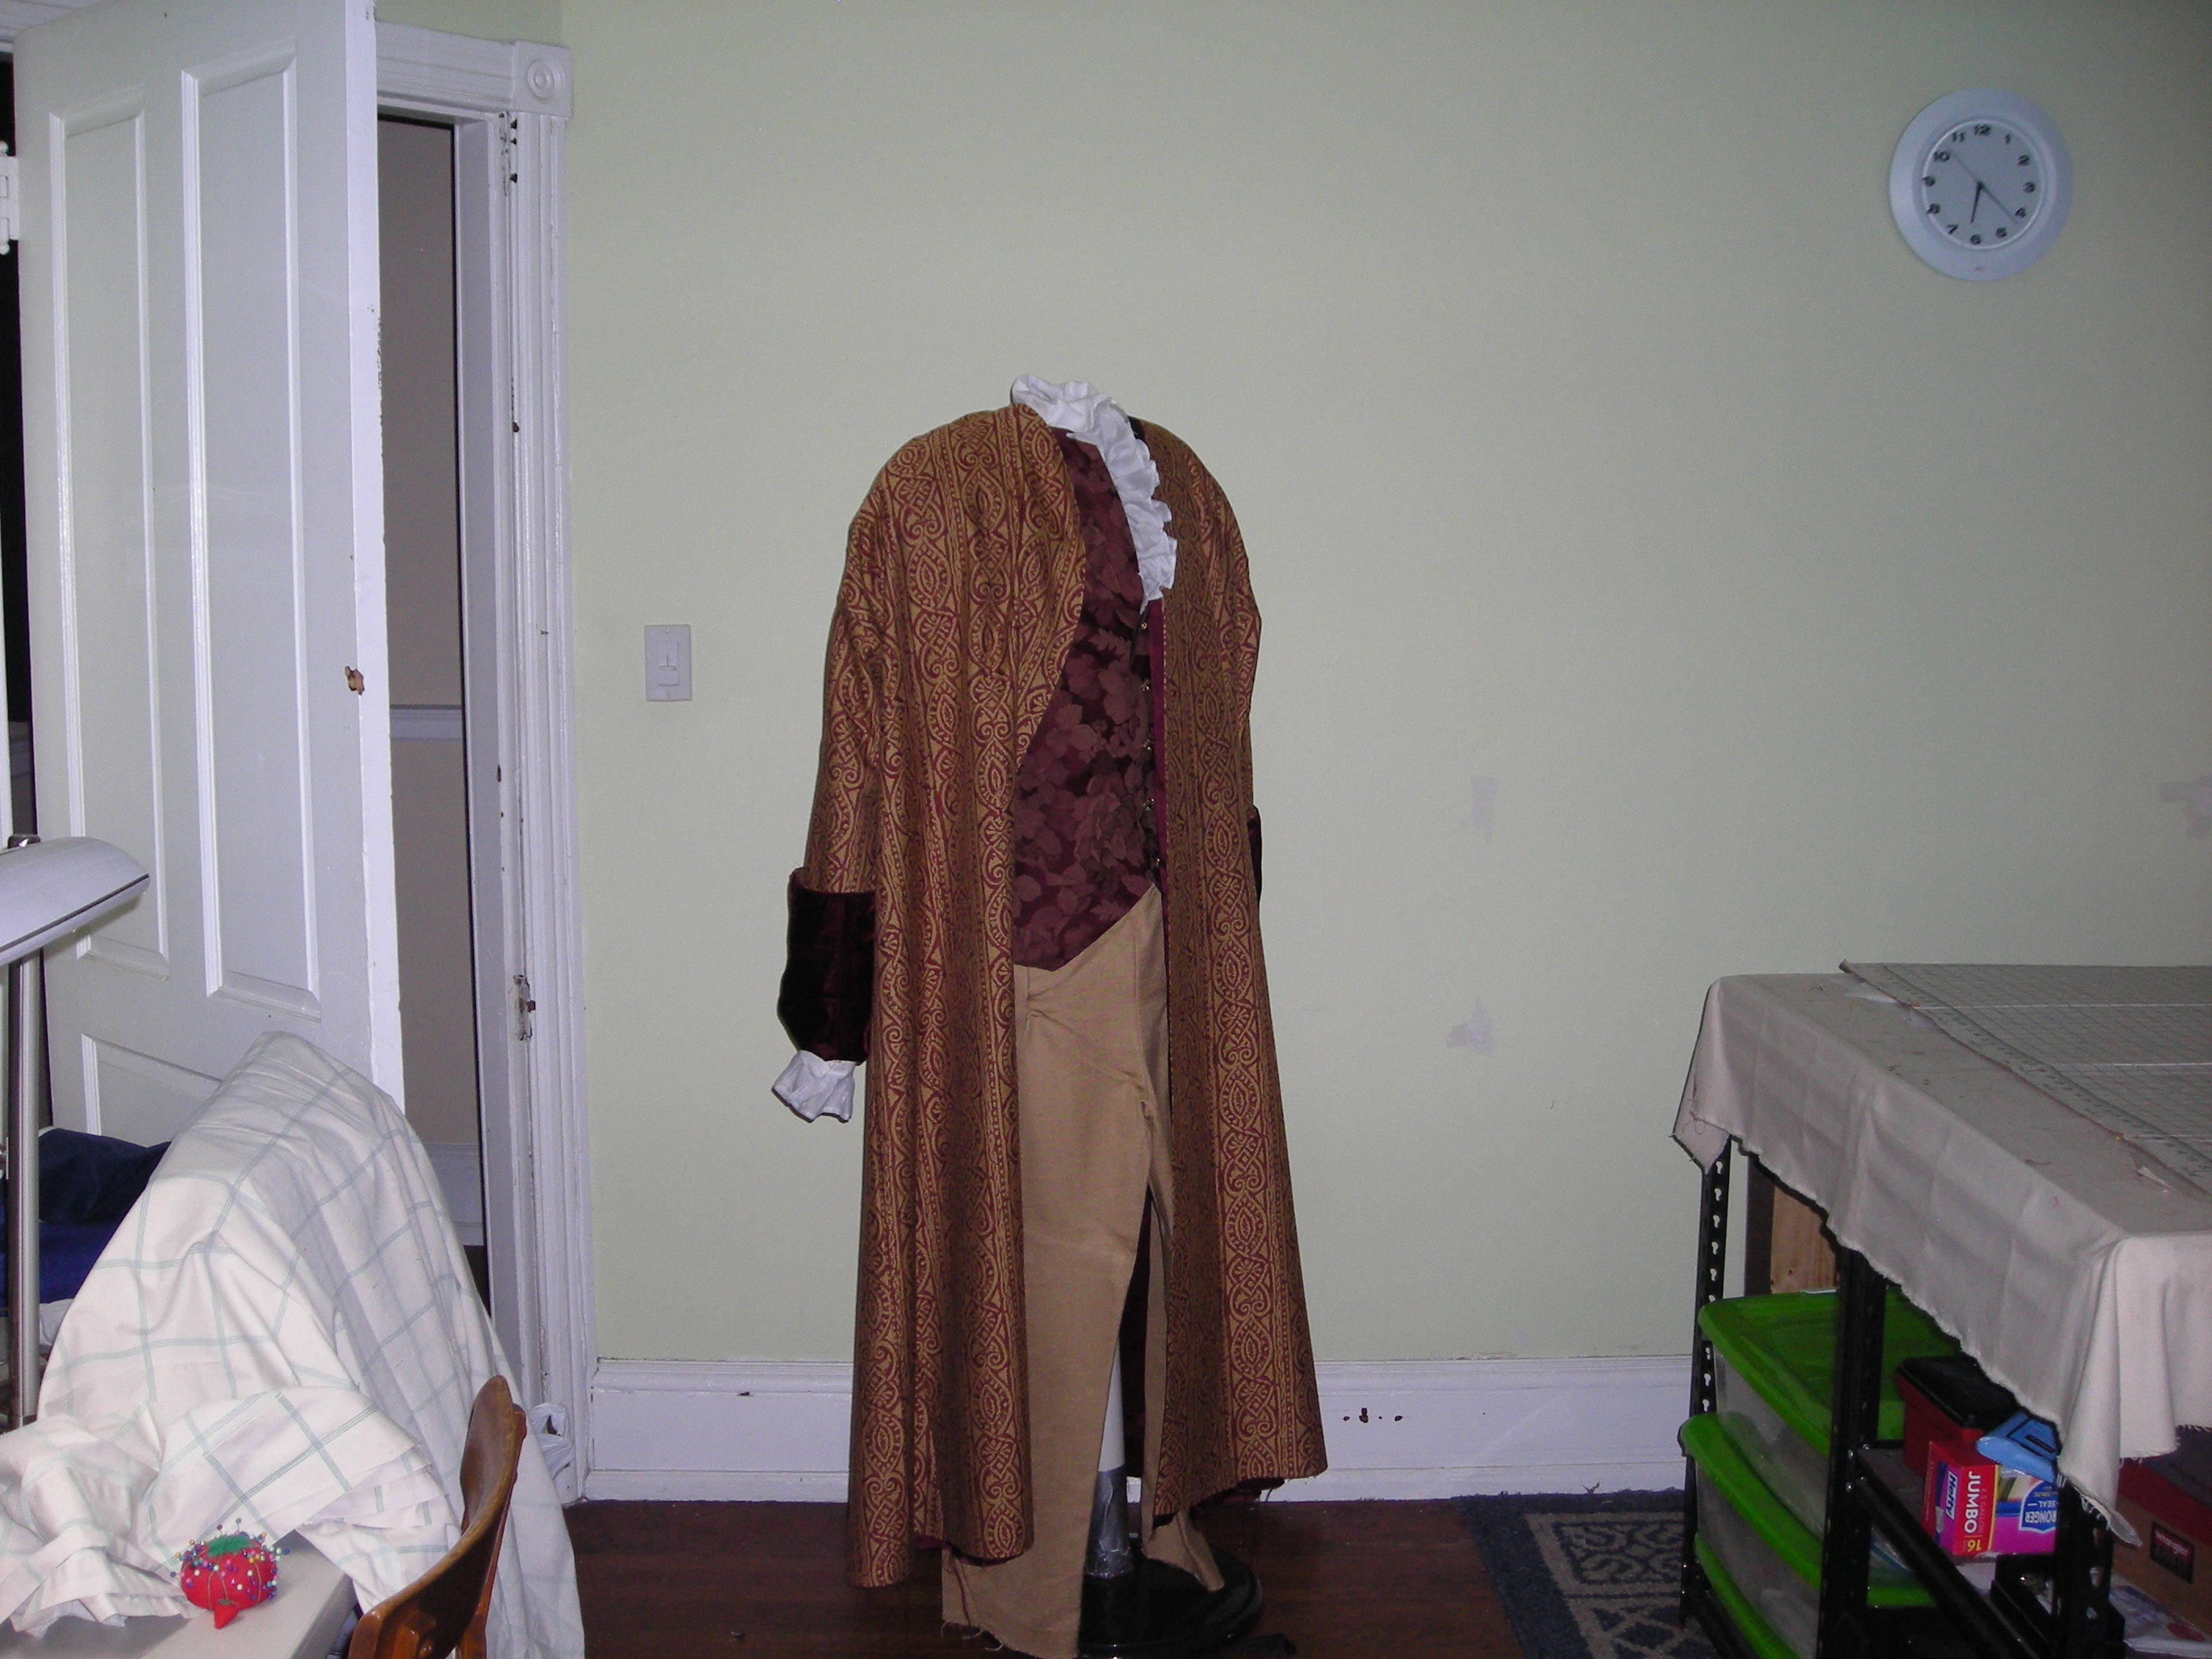
Tada, the finished Travel Suit:
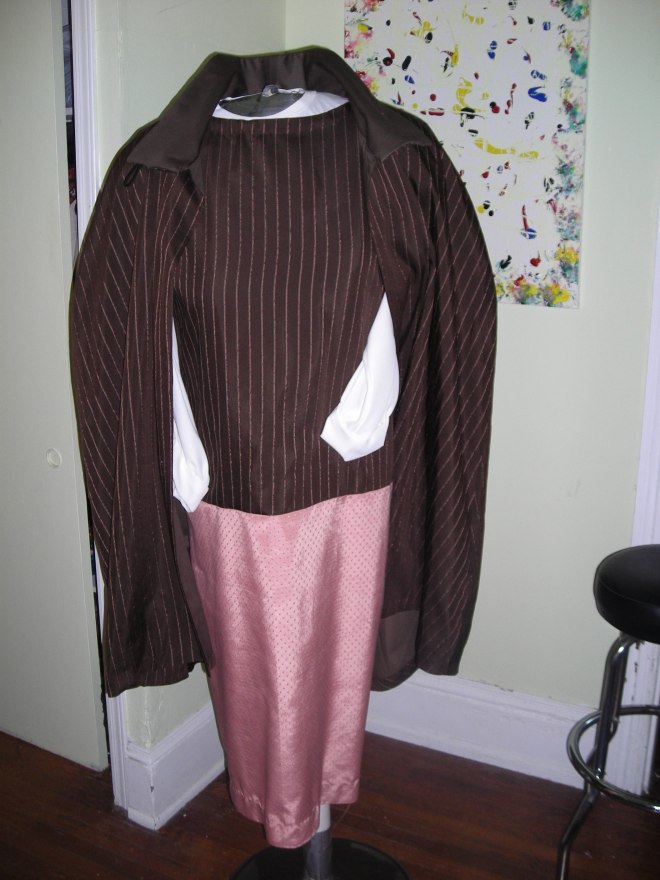
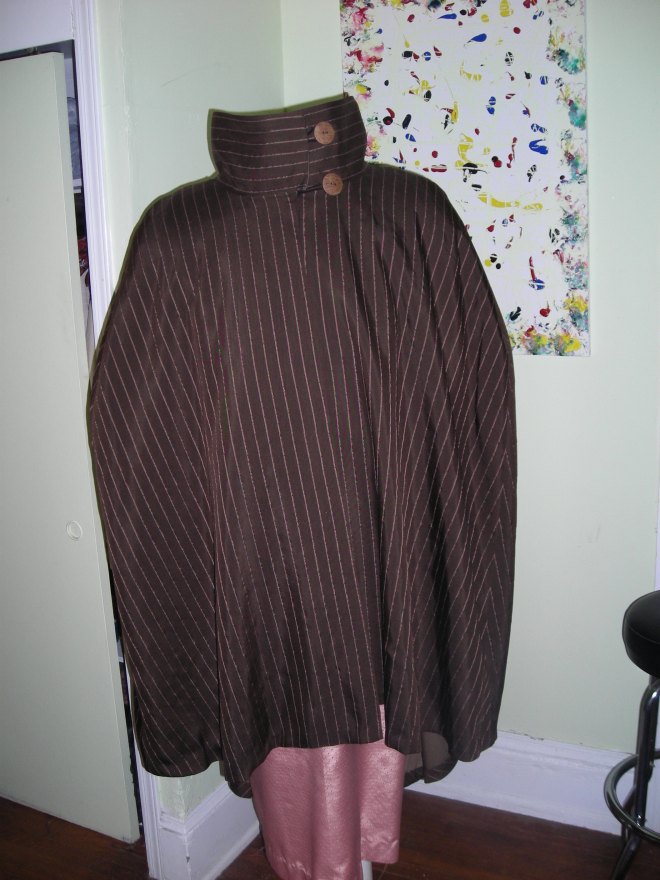


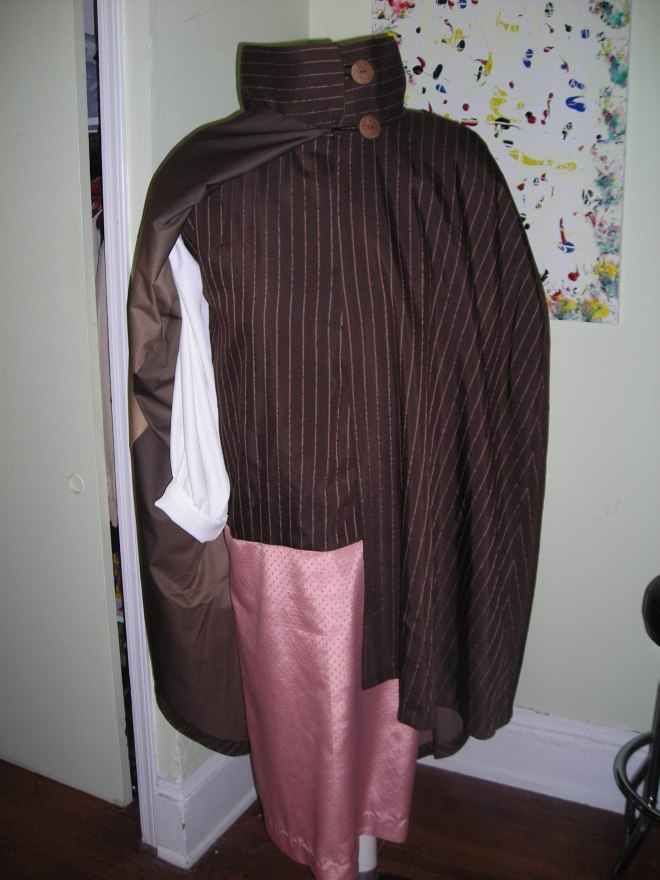
It is done!